▾
▾
-
English -

Español
 ▾
▾
-
English -

Español
▾
▾
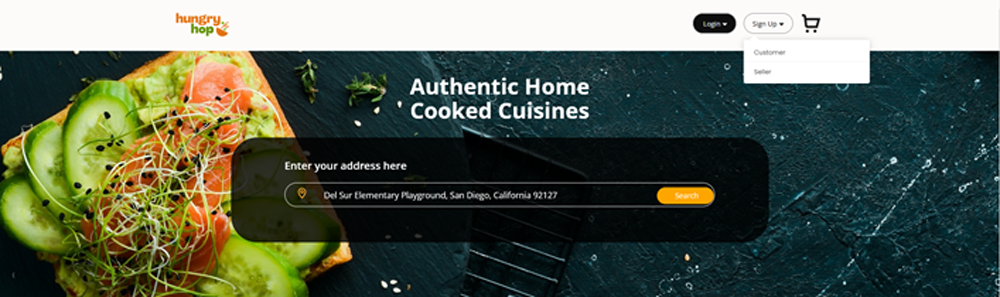
Welcome to Hungry Hop! We're excited to have you join our platform as a seller and share your incredible food creations with our vibrant community. This guide will walk you through our simple step-by-step registration process to help you get started on your selling journey. Let’s get started!"
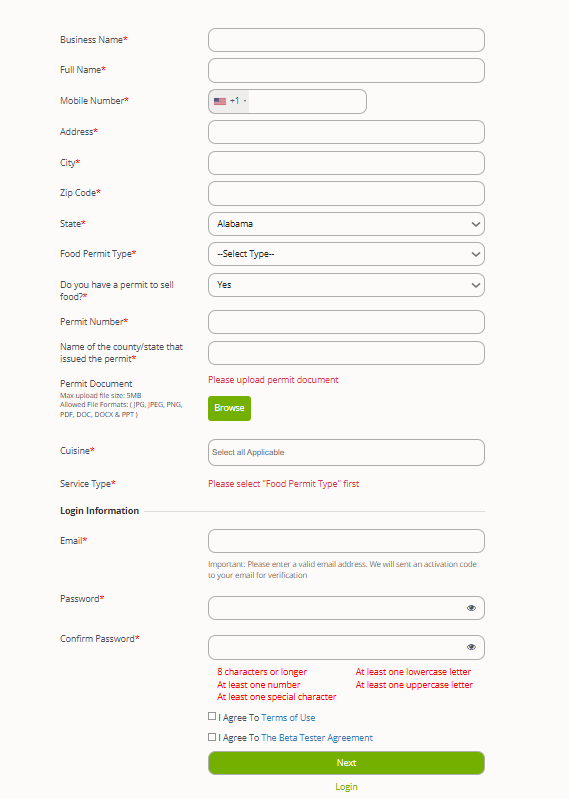
Please check your inbox and spam for a verification email with the code from hungryhop.com. Enter the code on the website to activate your account.
Create your first store:
When you first sign up, it will create your seller profile and also the first store will be created with the name you entered in “Business Name”.
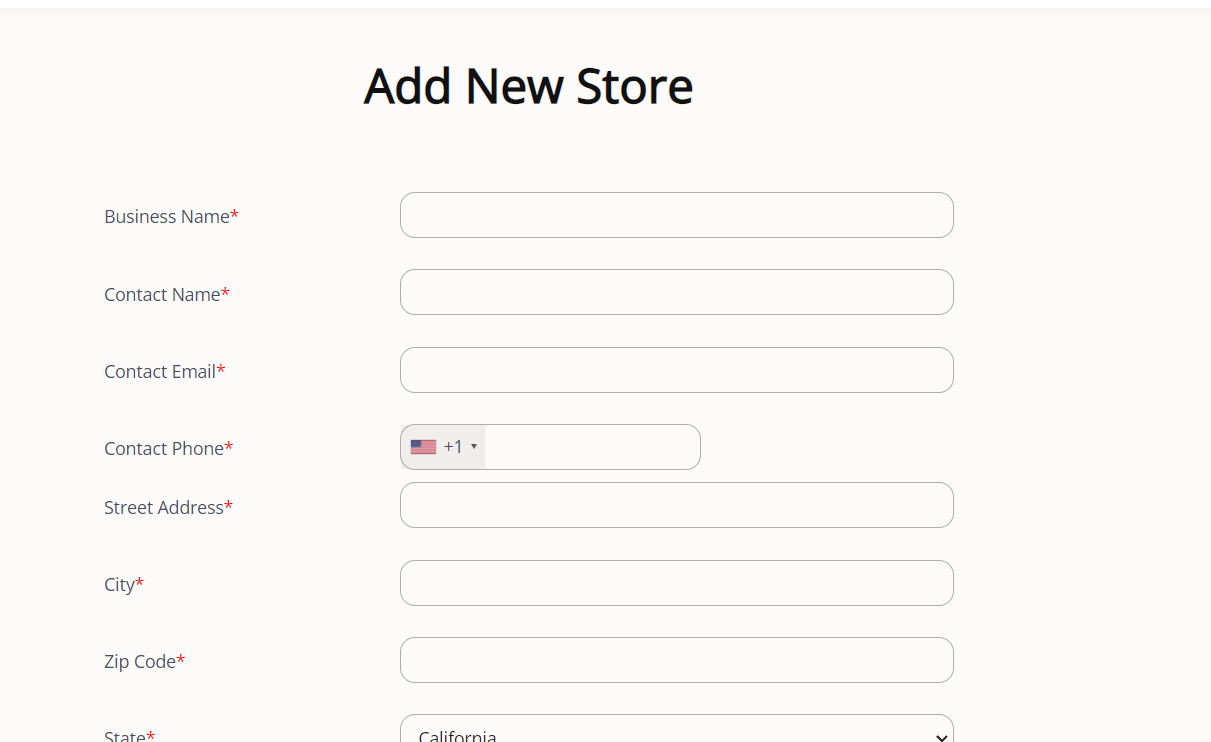
Creating additional stores:
If you operate multiple stores at different locations, you can create them all under a single account. For a single mobile or pop-up store that operates at different addresses on different days of the week, you can set multiple addresses for the same store using the 'Manage Store' option for that store. Please note that the multiple locations option is not available for MEHKO.
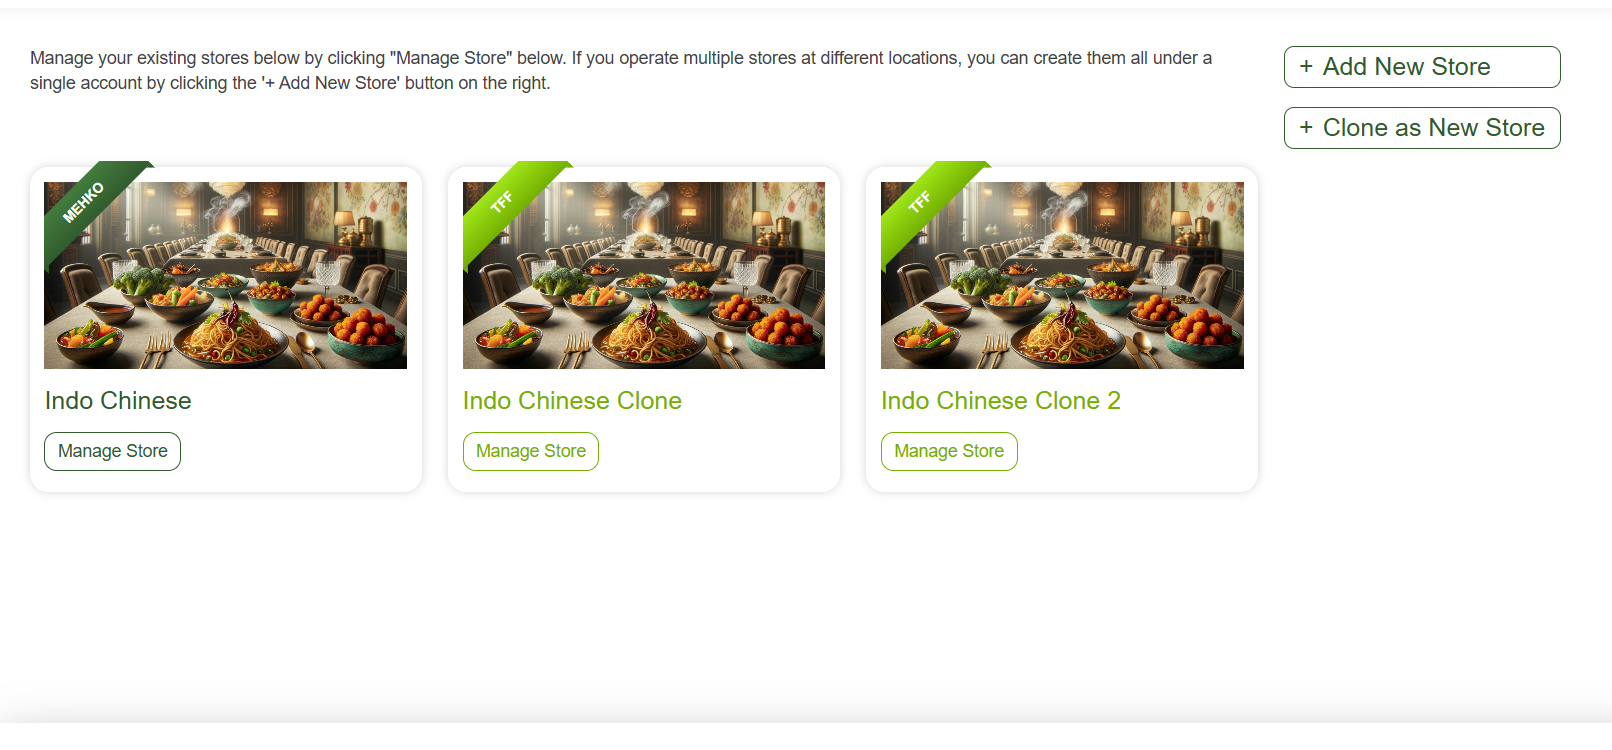
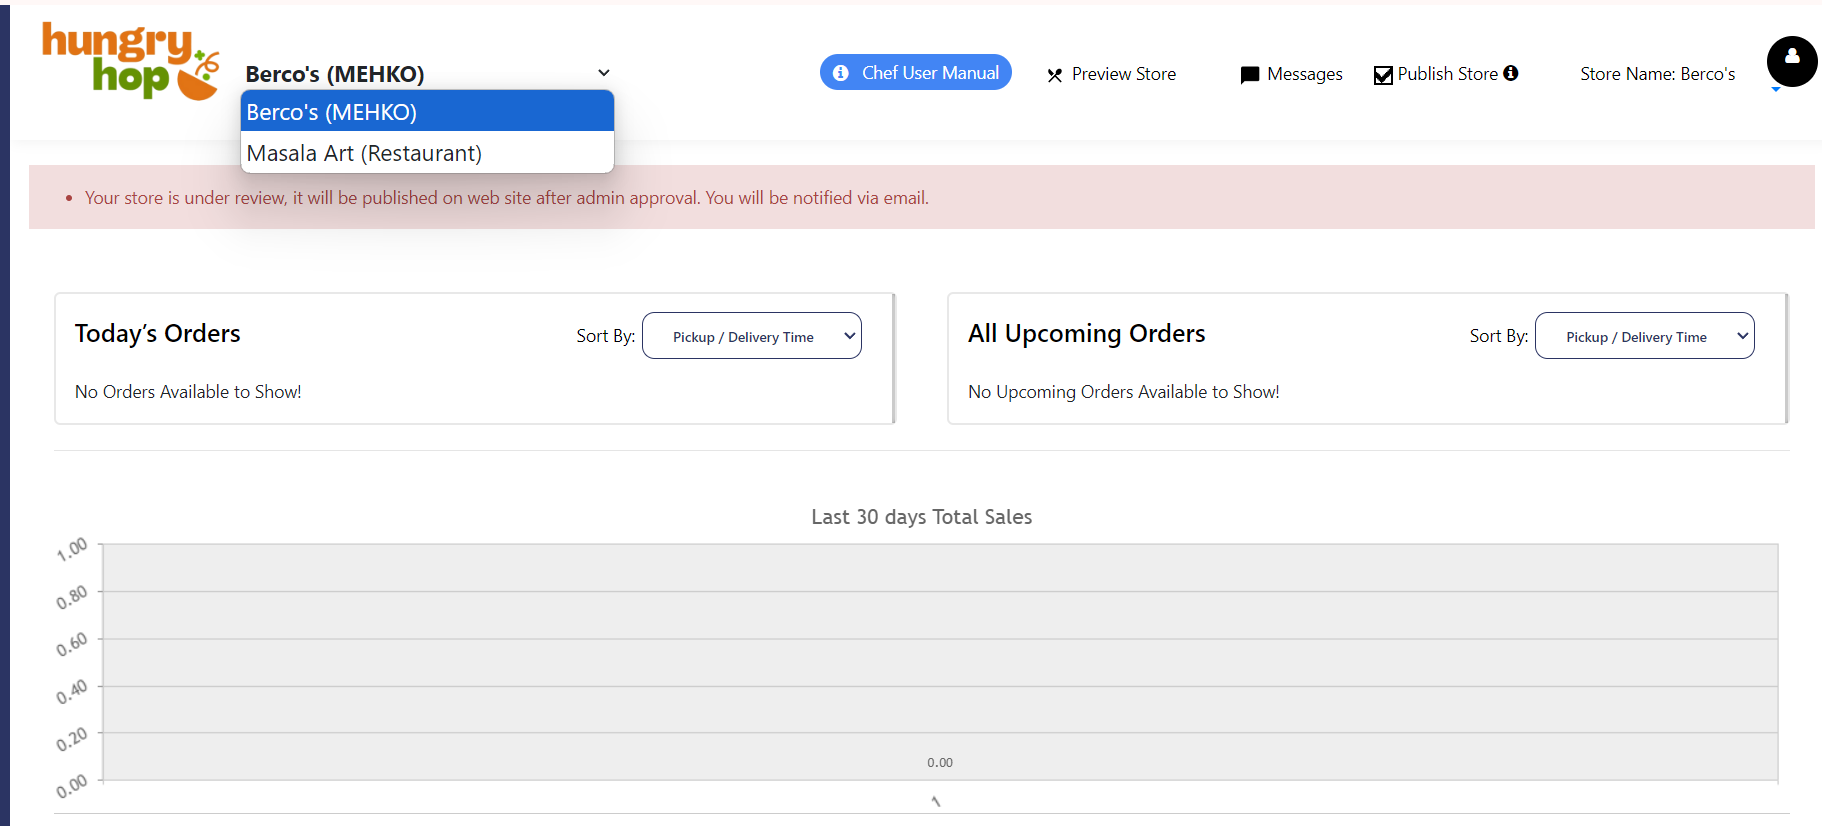
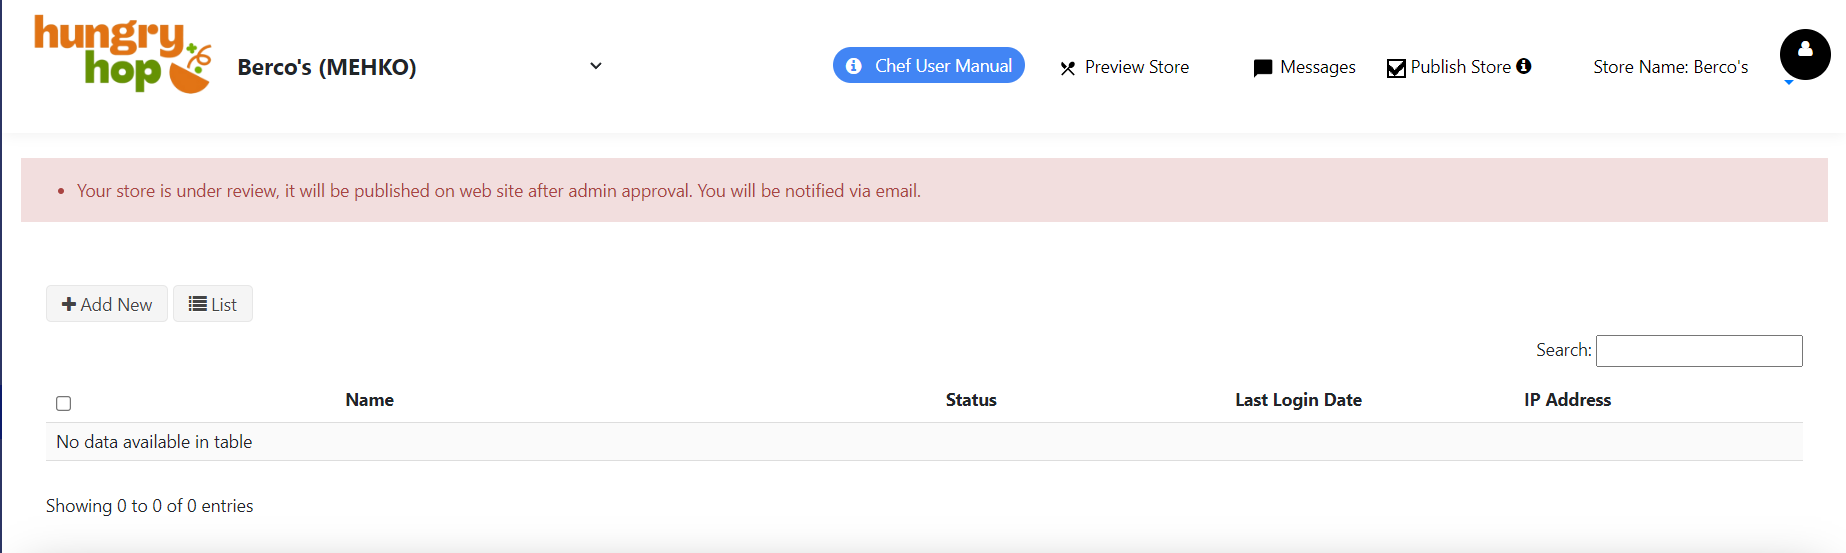
Once logged in to your account, you will see all the stores you have created. From here, you can
Upon logging in to your store, you'll see a page showcasing today's order and order history from the past 30 days. As your store becomes operational, you can track your total sales here. At the top left corner, you can also change between stores if you operate more than one store.
This option provides an overview of all orders placed, enabling you to manage them effectively.
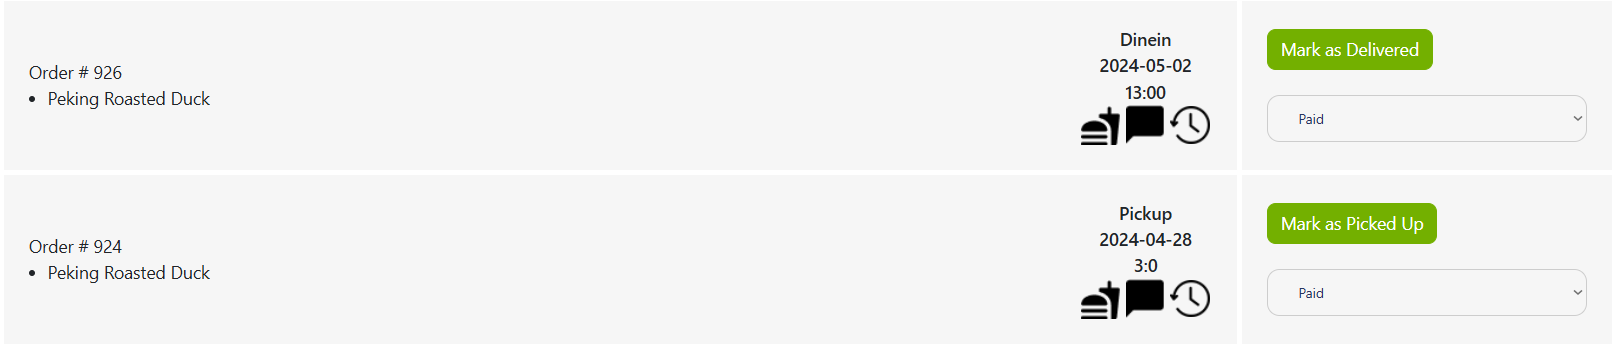
For the initial “Paid” order, you will see the status “Paid” in front of each order, indicating that the order has been paid and is now ready for preparation and completion.
The green button against each order will say “Mark as Delivered” or “Mak as Picked up” depending on the order method. Once you have delivered the order, please click the green button next to the order so that it is marked as complete. Payment will be released to you within 72 hours after completion.
If you wish to cancel the order, please click on the drop-down and select “Cancelled”. This will cancel the order, and no further changes can be made to this order.
There are 3 icons next to every placed order.
Order Details Icon: By clicking on this icon, you can view the order details, including the ordered items, their prices, any applicable taxes, tips, and delivery/shipping charges.
Messaging Icon: Clicking on this icon allows you to chat with the buyer, provided they are available on the web or mobile app and logged in.
History Icon: This option displays the order's history.
Store Info: ‘Store Information’ Section
To complete your profile, go to the 'Settings' section and navigate through the sub-menu, starting with 'Store Info' and ending with 'Alerts Notification'.
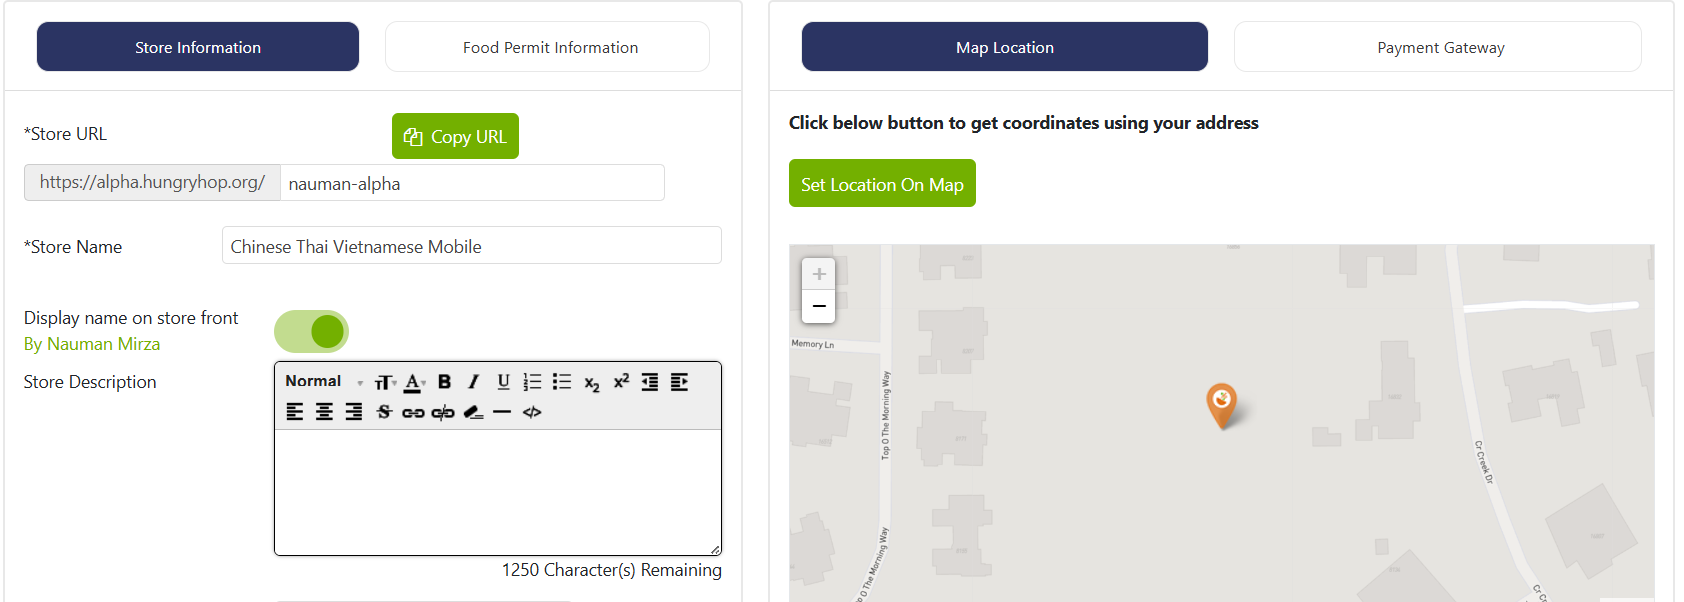
Click on the 'Store Info' button. In this section, you can edit or update the description you provided during sign-up.
Do you have liability insurance? Select 'Yes' only if you are currently insured. If you do not have insurance, we strongly recommend obtaining coverage as soon as possible to protect yourself from potential liability. Please refer to the FAQ section for sellers to explore affordable insurance options and learn more about getting started.
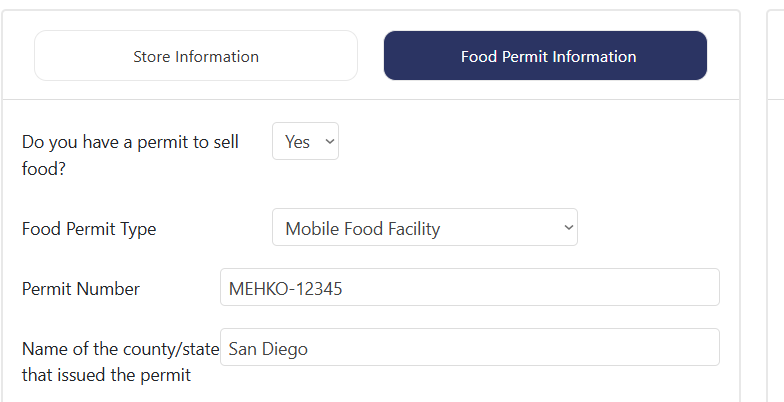
Do you have a permit to sell food? Select 'Yes' only if you have a valid permit.
Note: You can only sell food on the platform with a valid permit.
Under 'Food Permit Information', select your Food Permit Type from the drop-down list. Also, enter the Permit Number and upload a copy of the permit document.
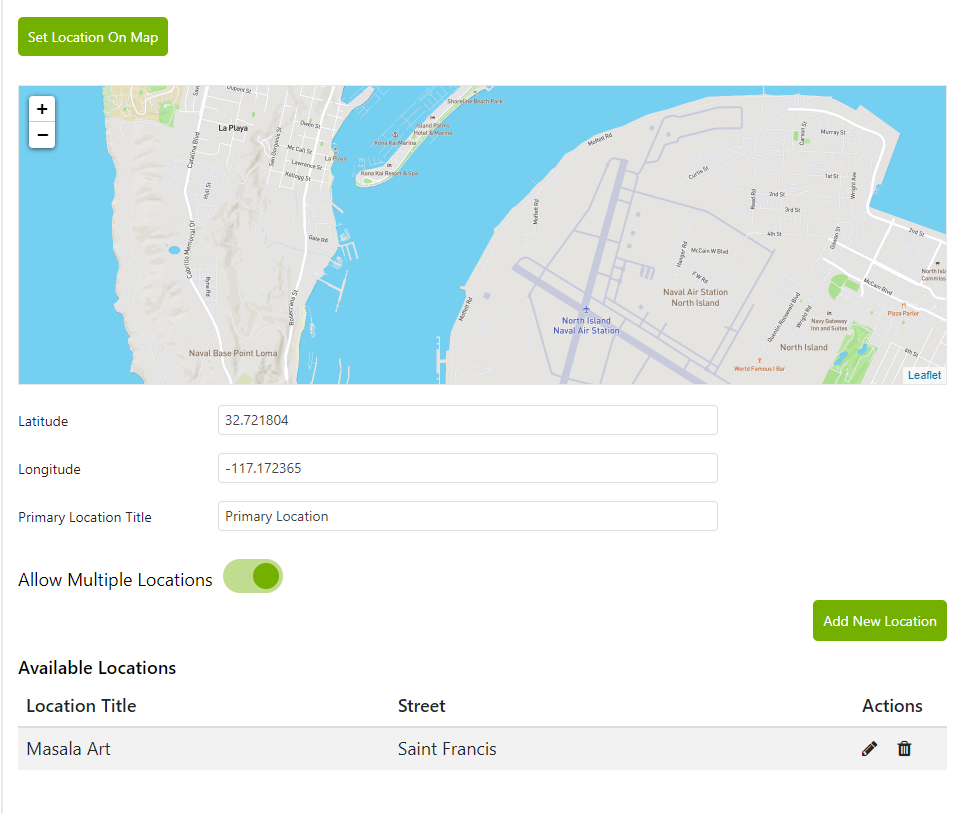
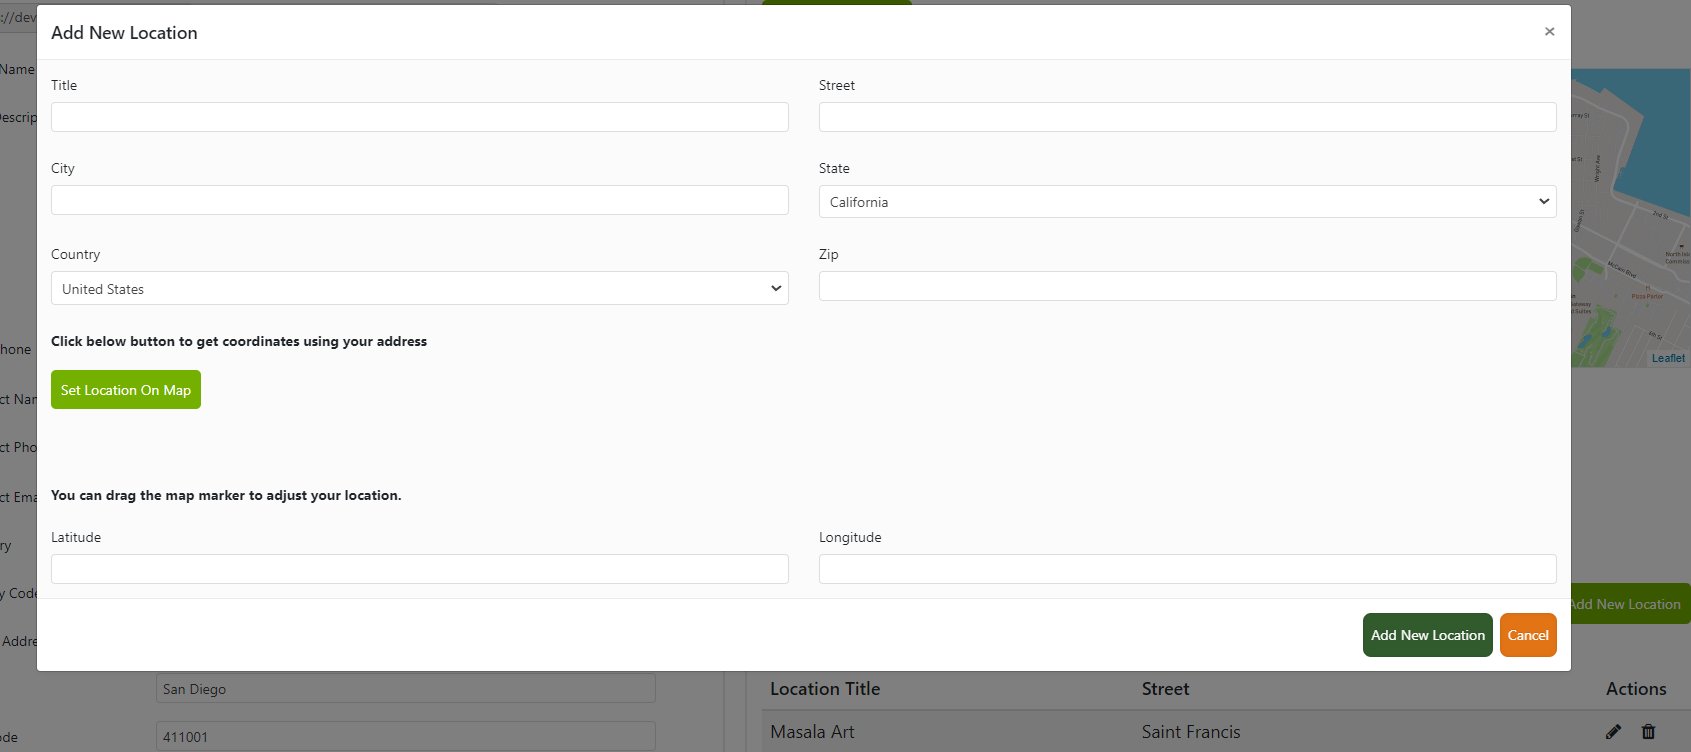
Click on 'Set Location on Map.' A map showing a pin at the business address entered in the 'Store Information' section will appear. Here, you can adjust the location of the drop pin if the shown location is not accurate. This is the location where customers will come to the store or pick up their food. Once you have selected the primary location, you can add more locations if your store is mobile (this option is available for all food permits except MEHKO).
Next, set up your Stripe account to get paid through Hungry Hop. Click the 'Payment Gateway' button to link it to your Stripe account. This step is essential as, without a connected Stripe account, your store won't be operational. You can connect multiple stores to a single Stripe account or have a different Stripe account for each store.
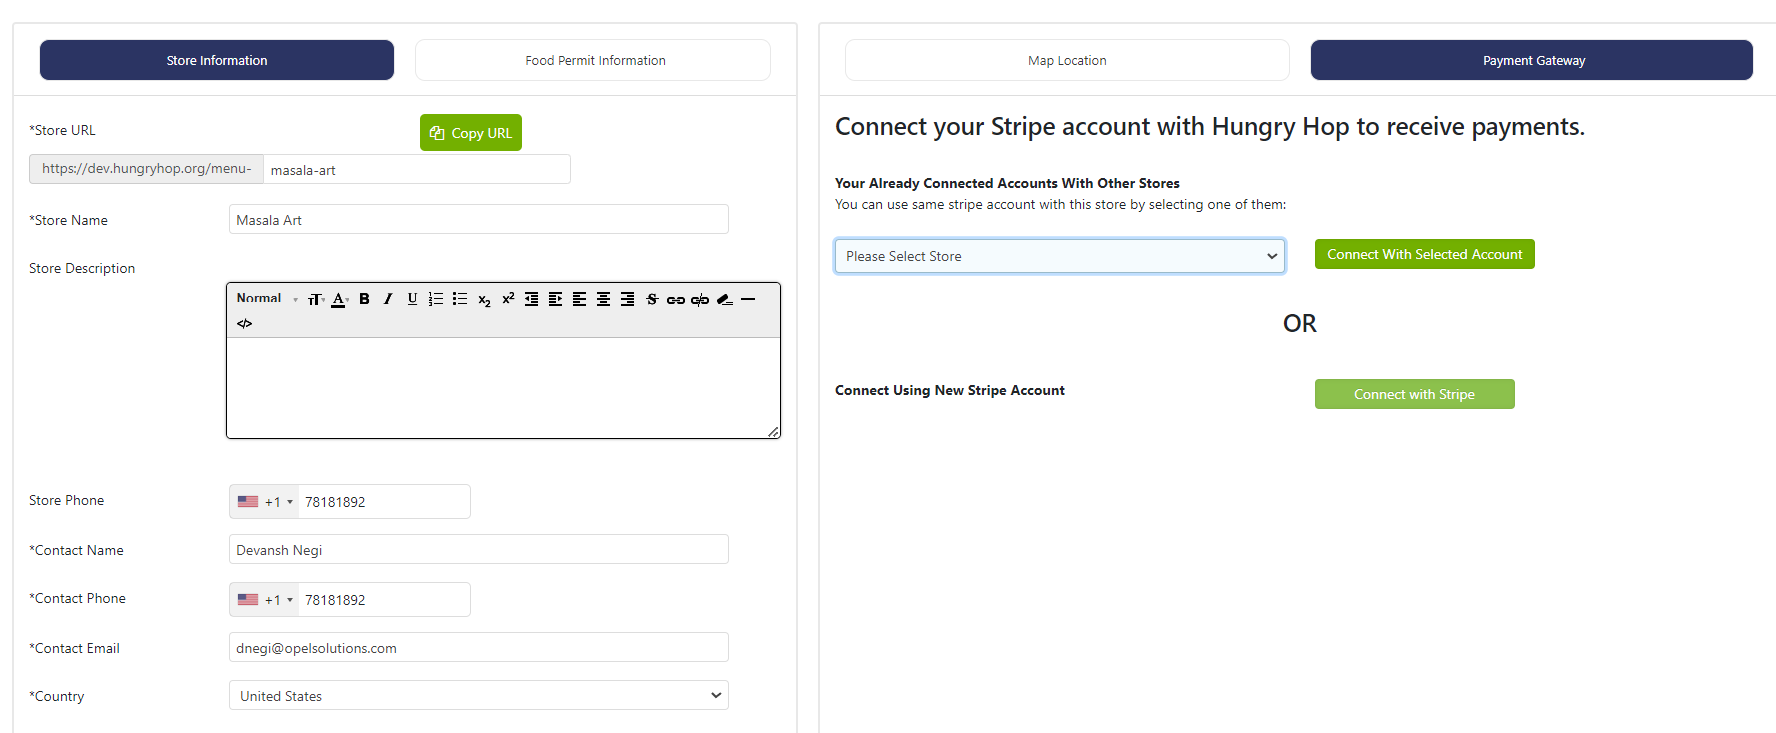
Note: Follow the instructions to set up the Stripe account. The instructions may differ from those below due to updates on the Stripe site.
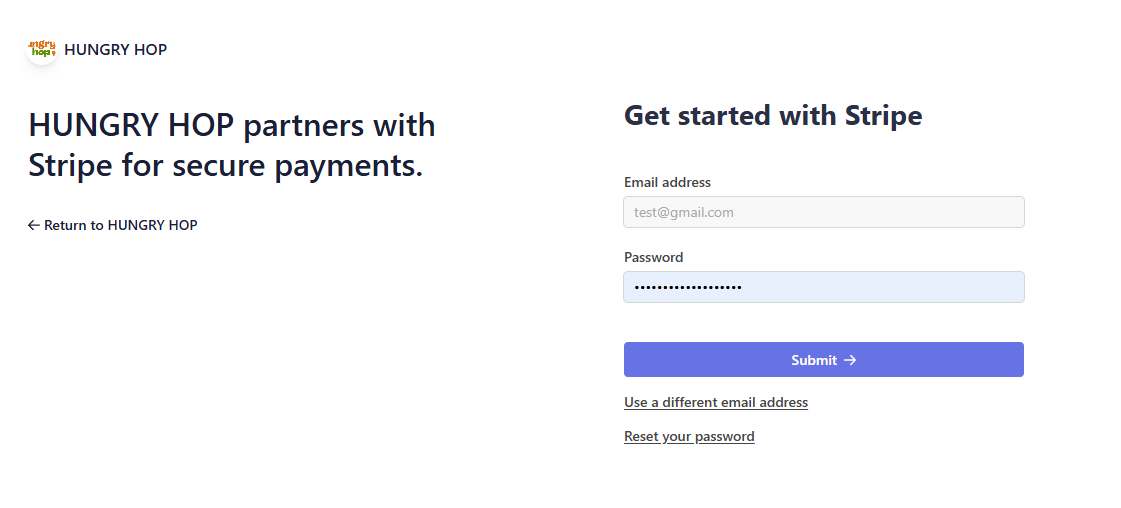
Start by entering your email ID in the field and click to continue.
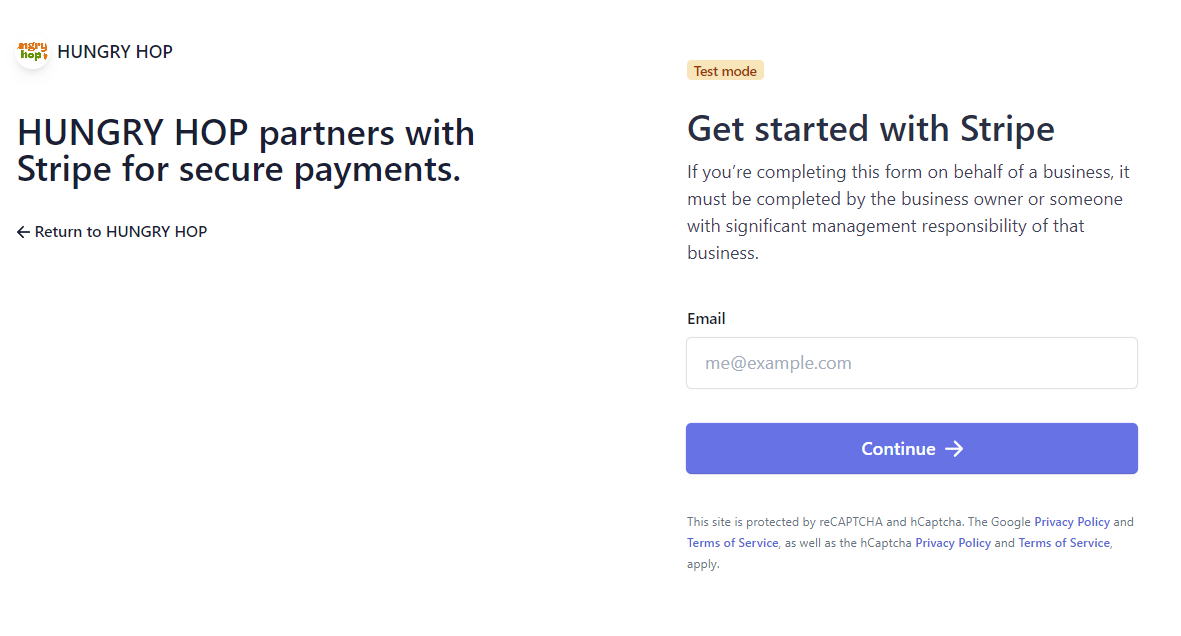
It will ask you to enter your password. If you don't have any, you can reset your password and start registering.
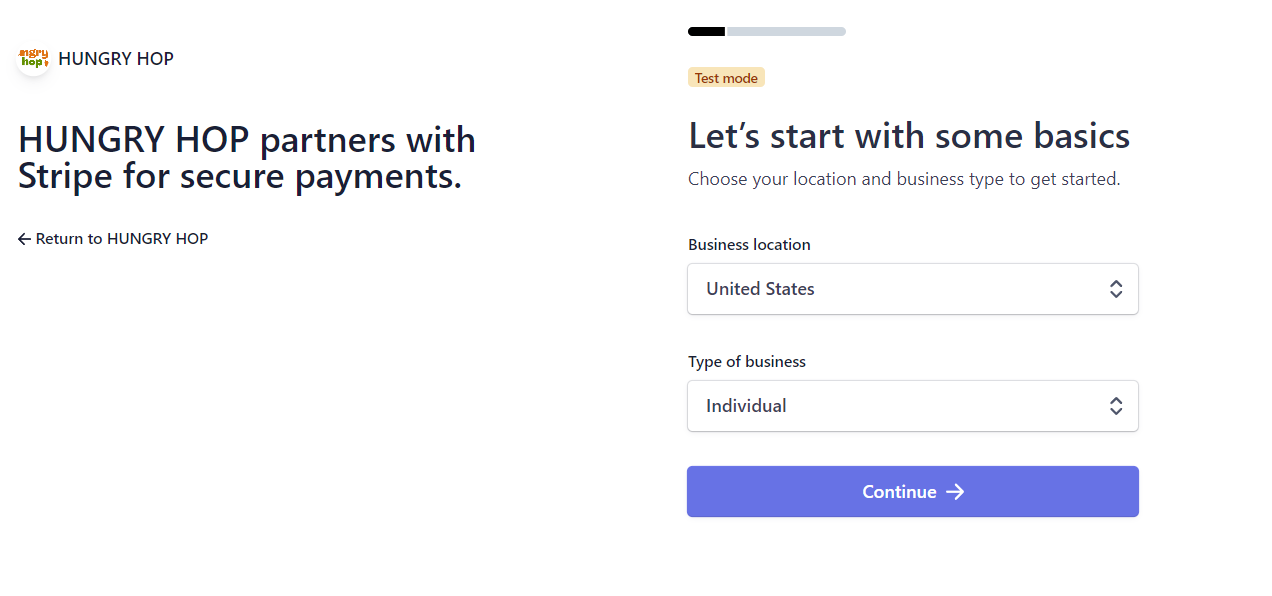
Enter your location and Type of business:
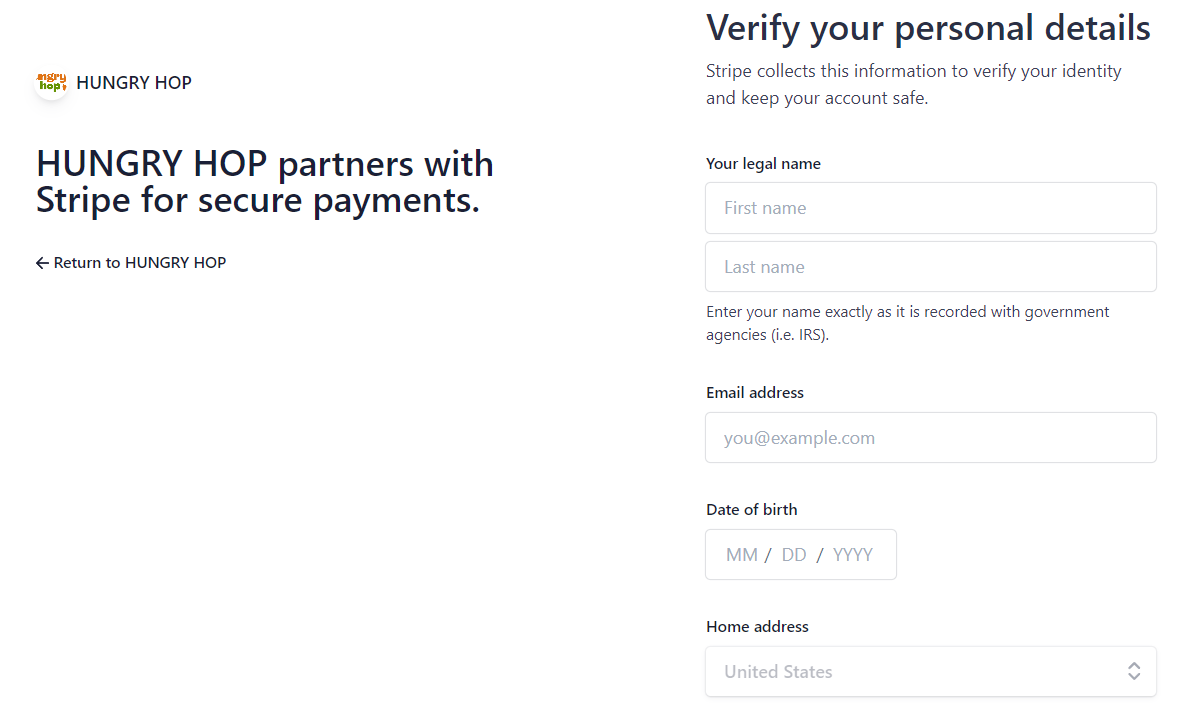
Enter your name, date of birth, and home address as recorded with Government Agencies such as the IRS.
Follow the procedures, and you will eventually arrive at the dashboard, where you can view your payments and balances.
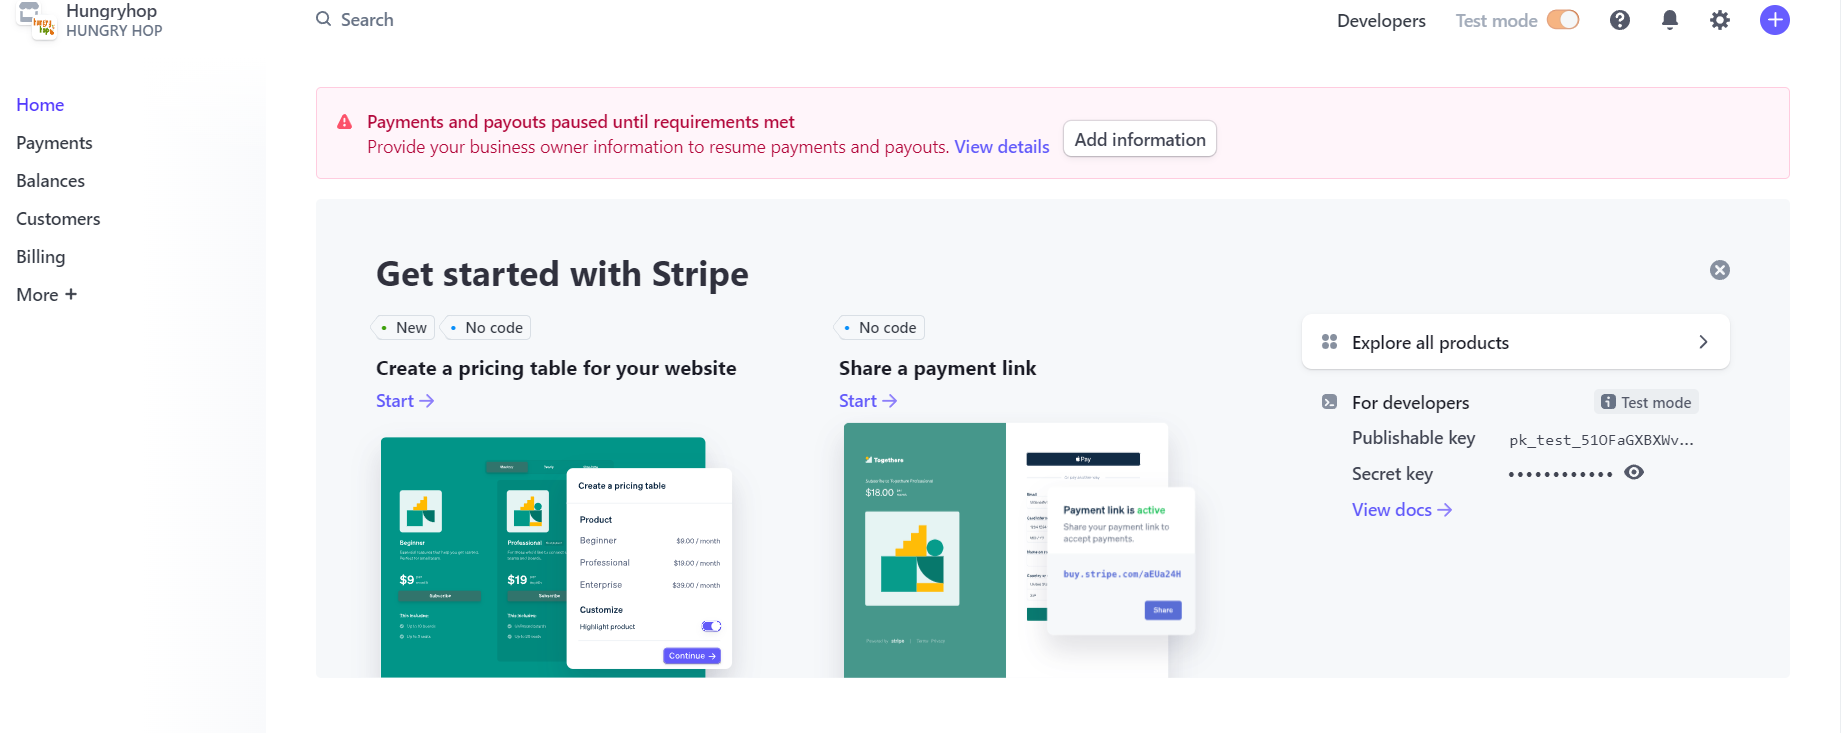
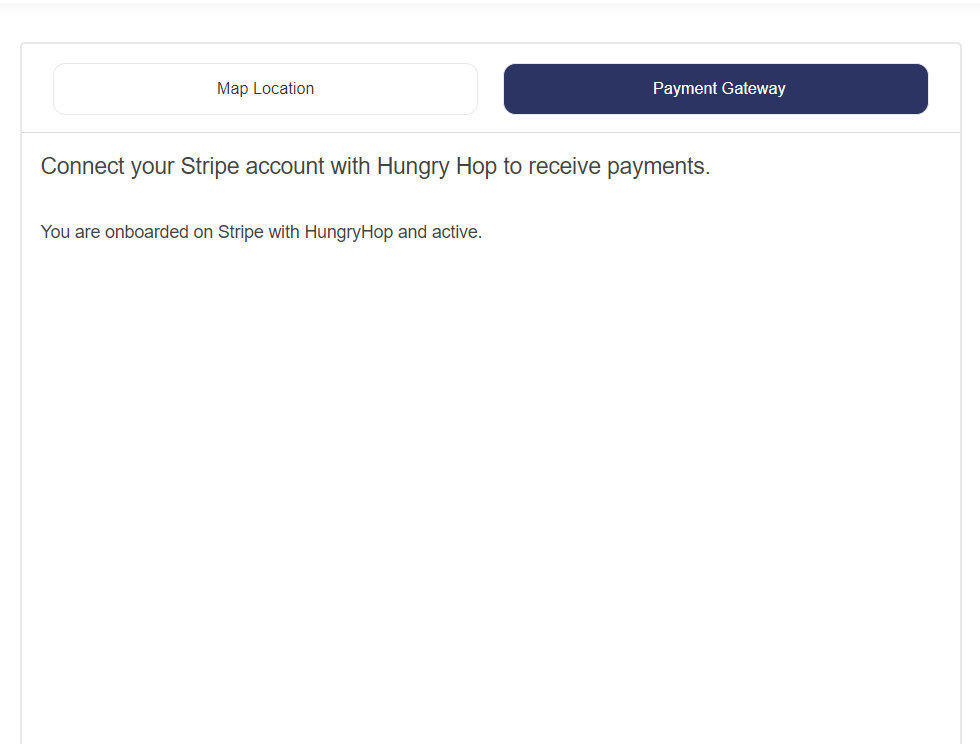
After successfully onboarding with Stripe through Hungry Hop and activating your account, you can continue entering additional details for your store.
Click on Settings and go to Store Settings. Here, you can manage Store Hours, Menu Display, Pick-up, Dine-in, and Delivery settings. The Menu items will be entered after these settings are complete.
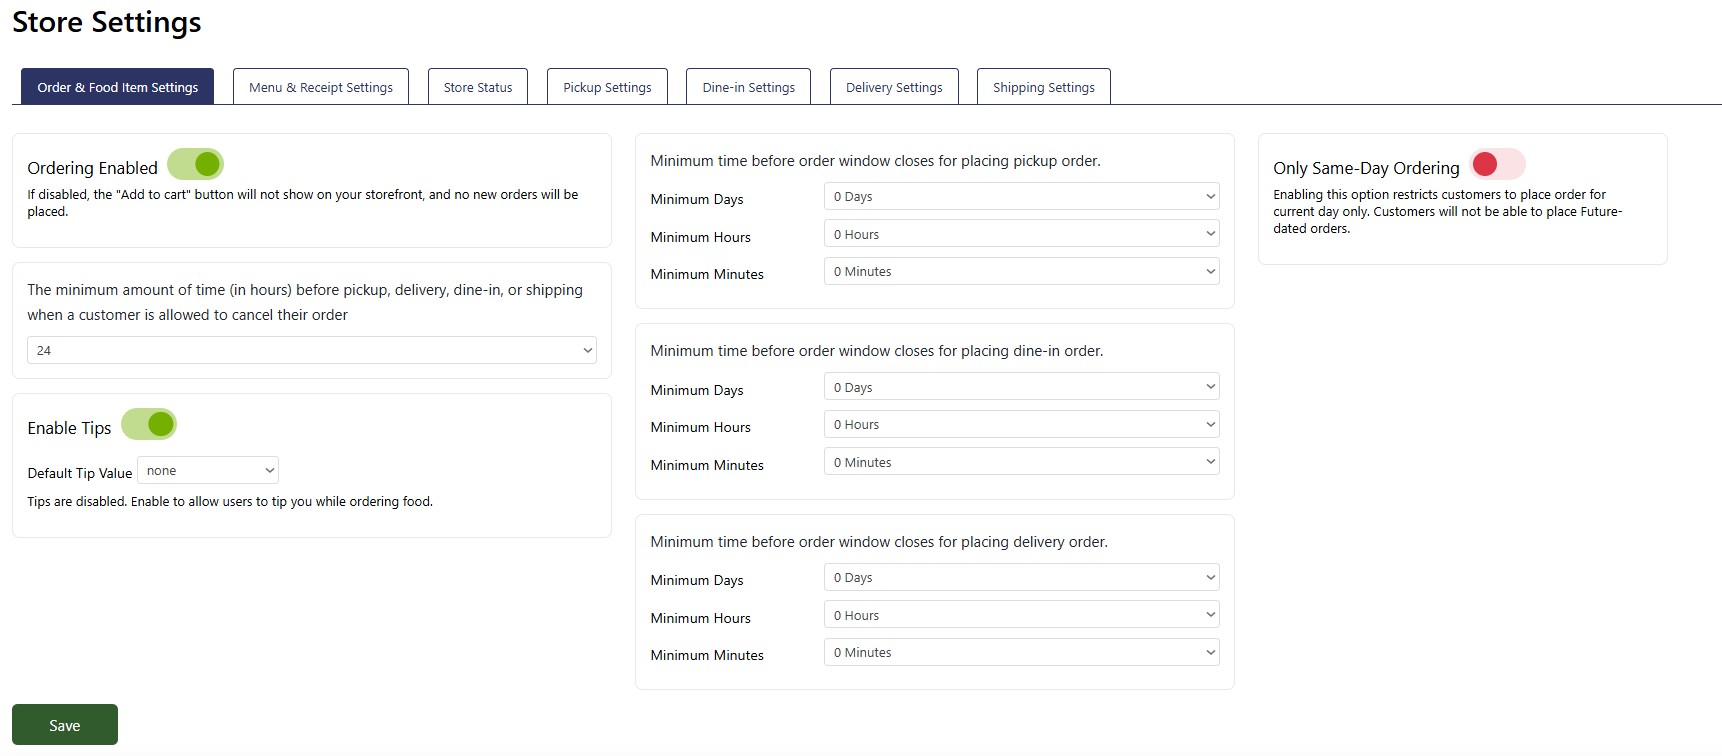
Ordering Enabled: This button enables or disables the option to receive orders on your storefront. If disabled, the "Add to cart" button will not show on your storefront, and no new orders will be placed.
Timeframe before pick-up, delivery, or dine-in when a customer can cancel their order: Minimum time allowed for the customer to cancel the order. Once this minimum timeframe has passed, the customer will no longer be able to cancel the order.
Enable Tips: This option allows customers to tip when placing orders. Disabling this option will turn off tips at checkout. If enabled, you can also set the default tip amount here.
Minimum time for placing pickup, dine-in, or delivery: Enter the advance notice in days, hours, and minutes that you need at a minimum to provide each of the service types. All fields '0' values indicate you do not need advance notice for that service.
Only Same-Day Ordering: This option limits customers to placing same-day orders only, preventing the submission of future-dated advance orders.
Note: Please remember to click the 'Save' button at the bottom of the page after making any changes.
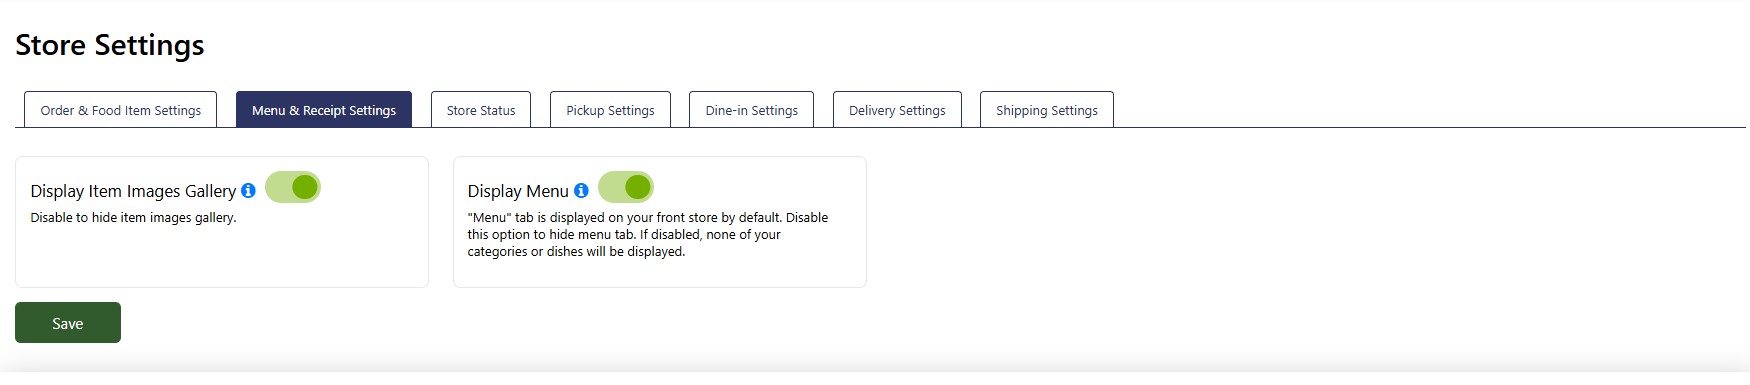
Display Item Images Gallery: Use this toggle button to turn the image gallery display on or off.
Display Menu: Toggle the button to turn the menu display on or off on the main page. Both these options should be enabled if you are actively taking orders for your store.
Note: Please remember to click the 'Save' button at the bottom of the page after making any changes.
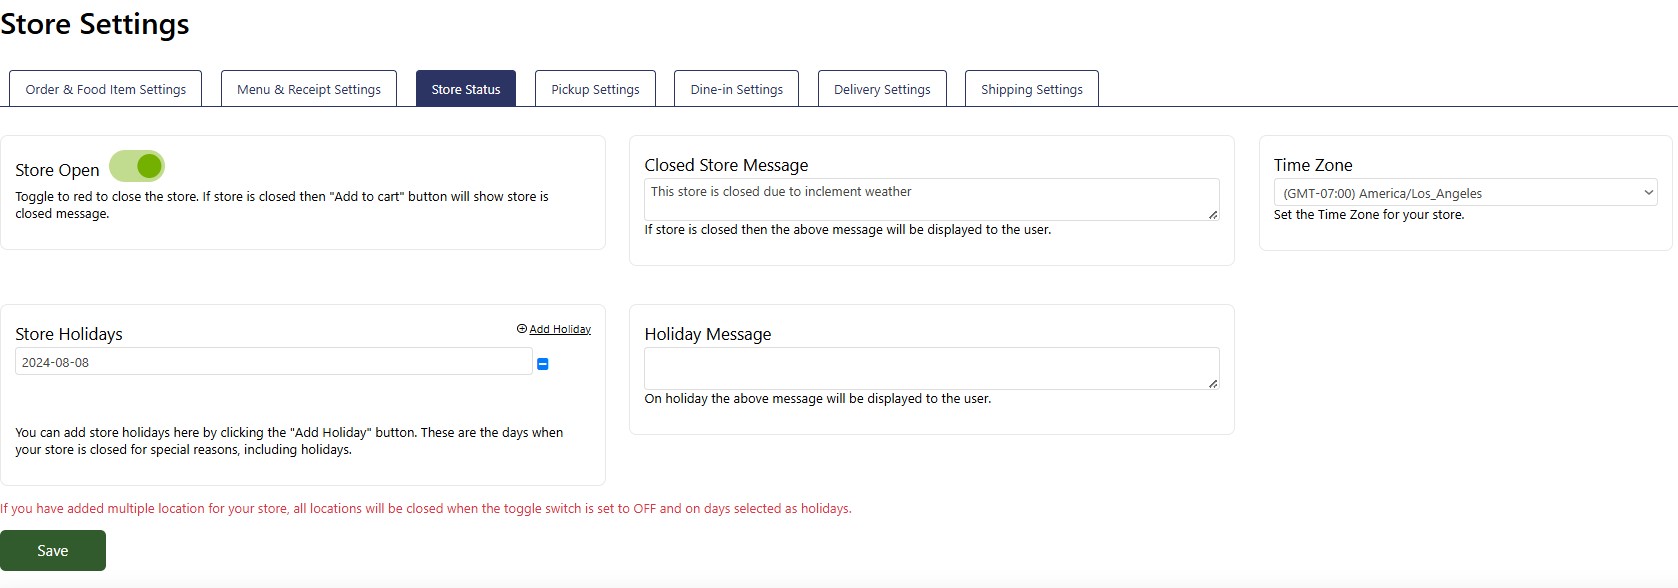
Store Open: Toggle the switch to red to close the store. When the store is closed, the "Add to Cart" button displays a message indicating that the store is closed.
Store Holidays: Click the "Add Holiday" button to add holidays. You can set these days in advance when your store will be closed. The customers will not be able to order food for these days.
Closed Store Message: This message is displayed to users when the store is closed (e.g., "Our store is currently closed. We apologize for any inconvenience. Please visit us during our regular business hours.").
Holiday Message: Customize the message shown to users during holidays (e.g., "We're taking a break for the holidays! Our store is closed today, but we'll be back to serve you soon.").
Time Zone: Set the correct time zone for your store. This is the time zone for your primary store address.
Note: Please remember to click the 'Save' button at the bottom of the page after making any changes.
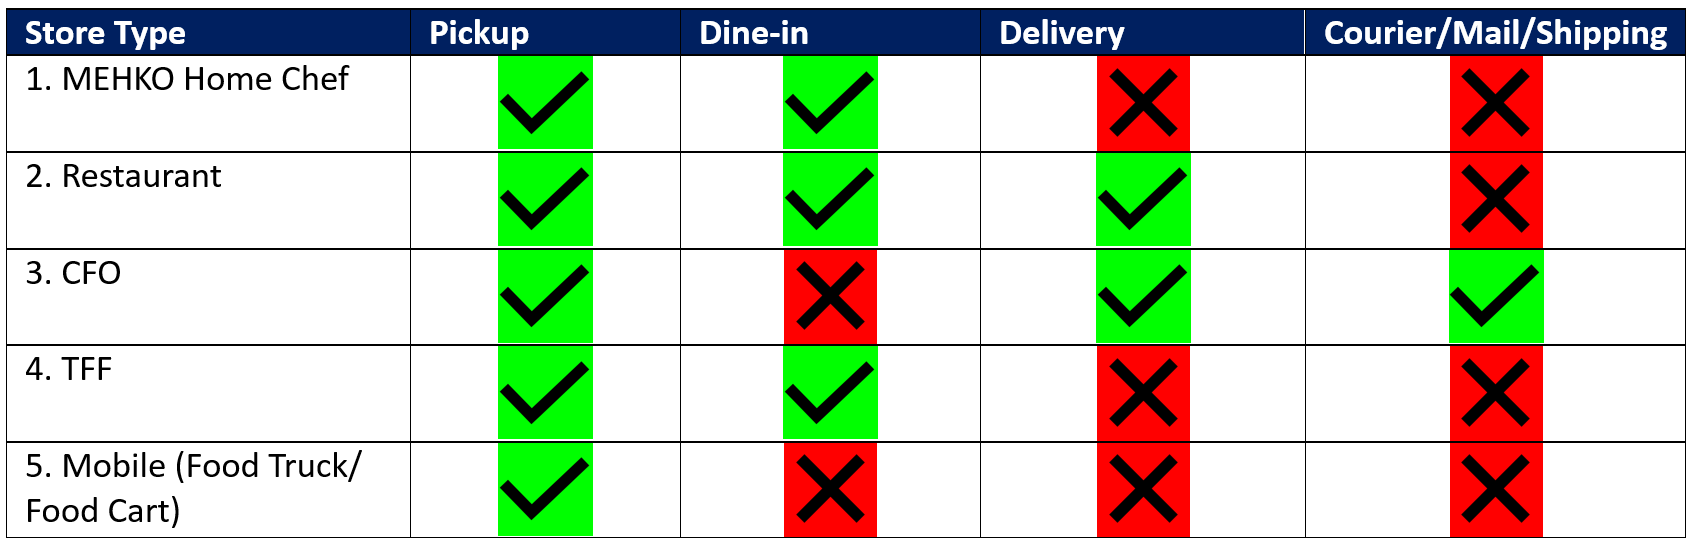
Depending on your store's license type, you can offer pickup, dine-in, delivery or shipping services. Following table shows the ability to offer services based on your license type.
Hungry Hop does not provide or facilitate any services; you, as a seller, are responsible for fulfilling the order for the requested service.
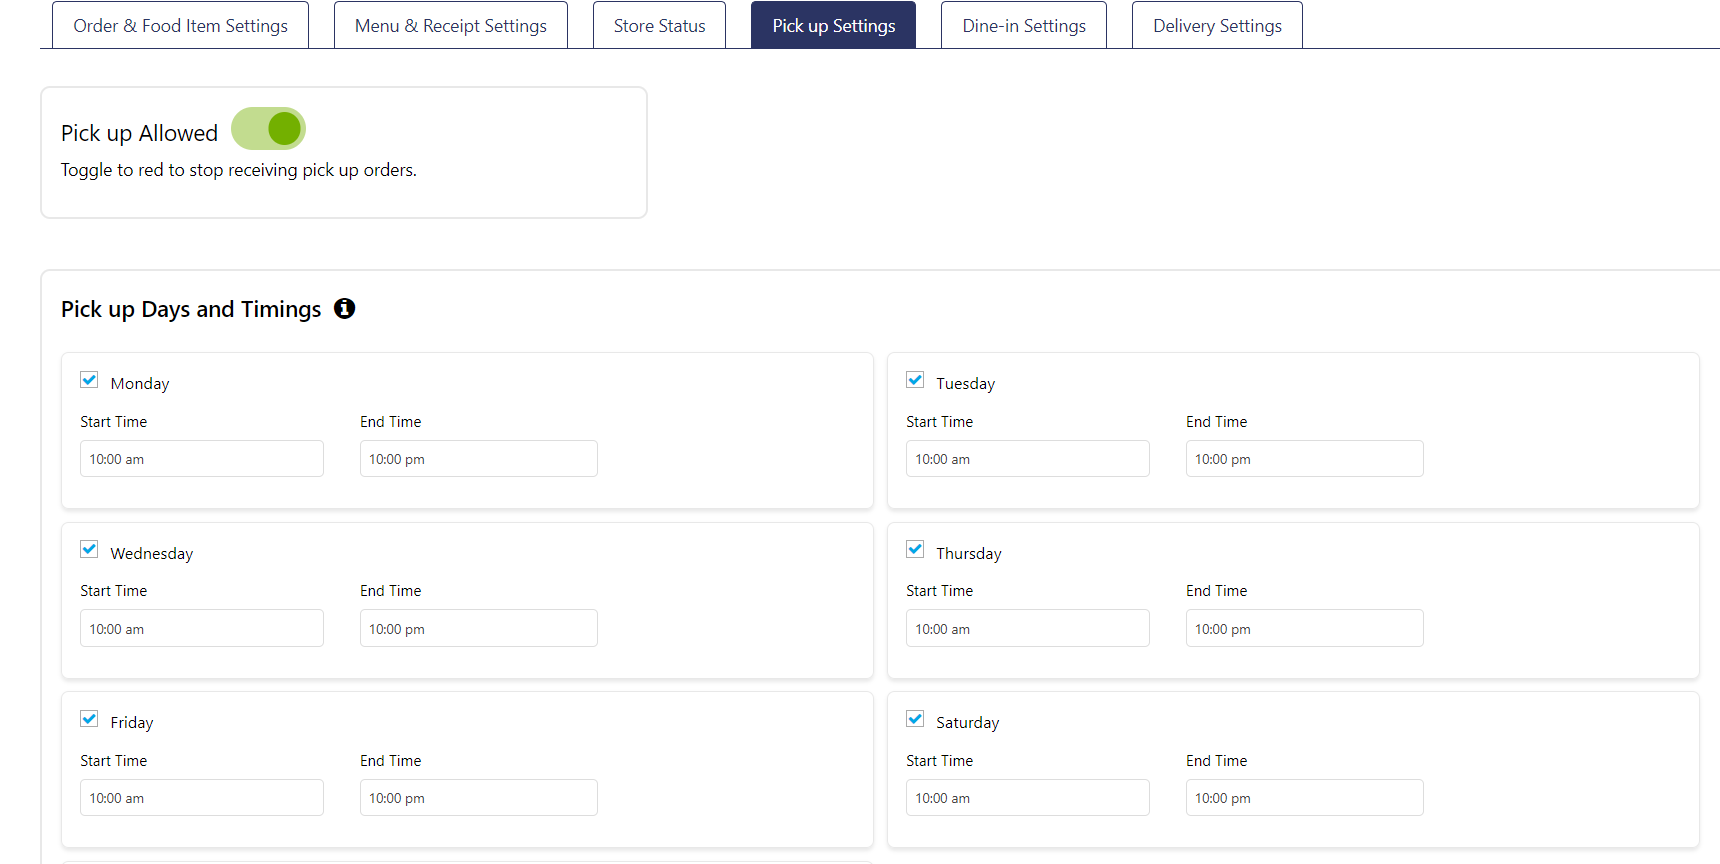
The following three tabs let you manage your Pickup, Dine-In, and Delivery settings, allowing you to customize them as desired and set daily hours. The settings in the 'Store Status' tab take precedence over these settings.
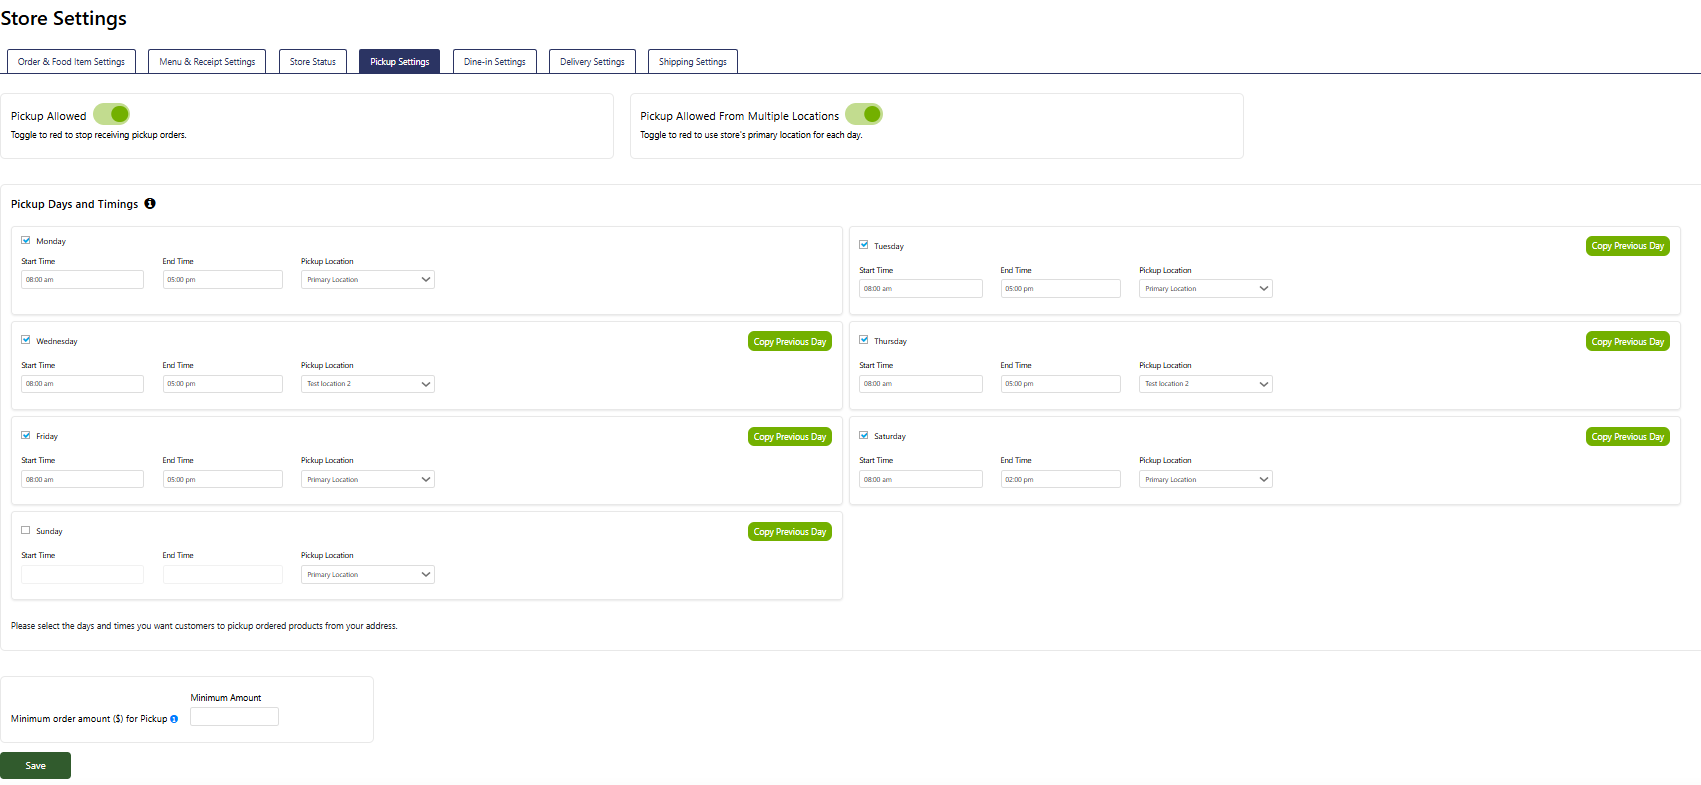
Pickup Allowed: Toggle this switch to red to stop accepting pickup orders. When its green, pickup orders are allowed.
Pickup Allowed from Multiple Locations: Toggle to red to use the store's primary location for each day.
Pickup Days and Timings: Specify the days and start/end times for pickup orders by selecting each day and entering the corresponding hours. This feature allows you to fully customize your store's weekly pickup schedule, ensuring customers know when they can collect their orders.
Note: Once you set up the hours for a day, you can copy the settings to the next day by clicking the 'Copy Previous Day' button for that weekday.
Minimum order amount ($) for Pickup: Enter the minimum dollar amount required to accept a pick-up order. The customer cannot place an order for pickup until that minimum amount is reached. Leave the field blank if there is no minimum amount requirement.
Note: Please remember to click the 'Save' button at the bottom of the page after making any changes.
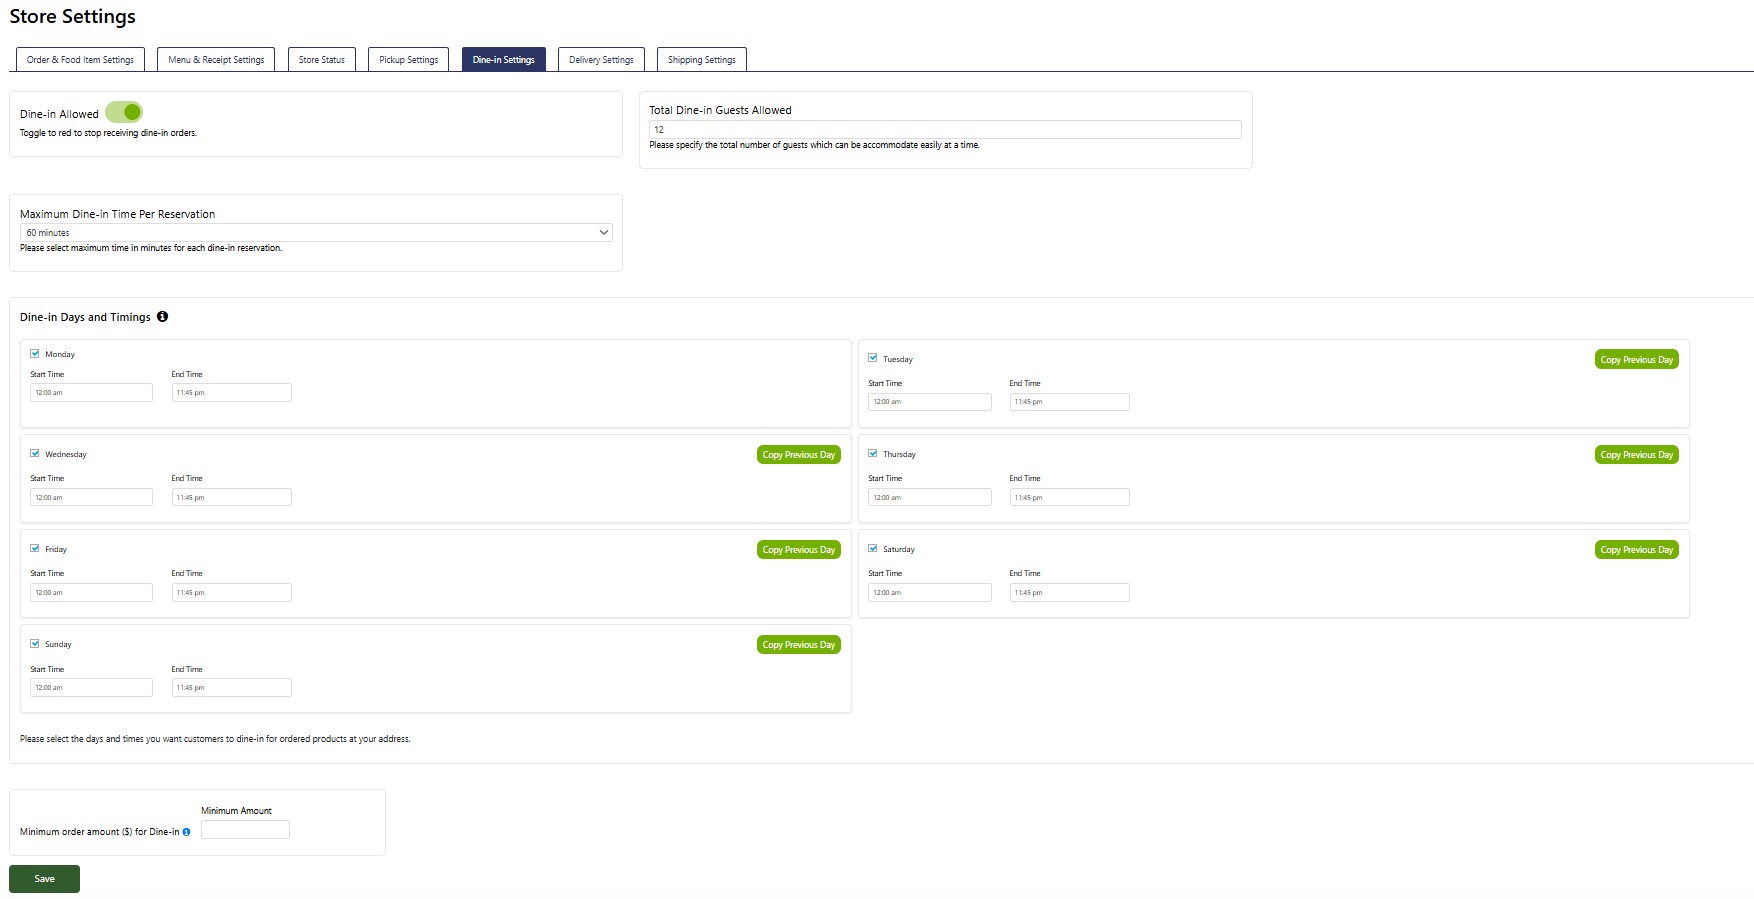
Dine-in Allowed: Toggle this switch to red to stop accepting dine-in orders. When it's green, dine-in orders are allowed.
Total Dine-in Guests Allowed: Set the total number of guests your restaurant can accommodate at one time. Customers will not be allowed to make a reservation once the maximum seating capacity has been reached.
Maximum Dine-in Time Per Reservation: Set the maximum time (in minutes) that each reservation is allowed to last. This helps manage the flow of guests and manage turnover for new reservations.
Dine-in Days and Timings: Set the specific days and start/end times for dine-in reservations by selecting each day and entering the appropriate hours. This feature allows you to customize your store's weekly dine-in schedule fully, ensuring customers are aware of when dine-in is available.
Note: Once you set up the hours for a day, you can copy the settings to the next day by clicking the 'Copy Previous Day' button for that weekday.
Minimum order amount ($) for Dine-in: Customers can place dine-in orders in advance along with their reservation. Specify the minimum dollar amount required to accept a dine-in order. Customers will not be able to make a dine-in reservation until this minimum amount is met. If no minimum amount is required, leave the field blank.
Note: Please remember to click the 'Save' button at the bottom of the page after making any changes.
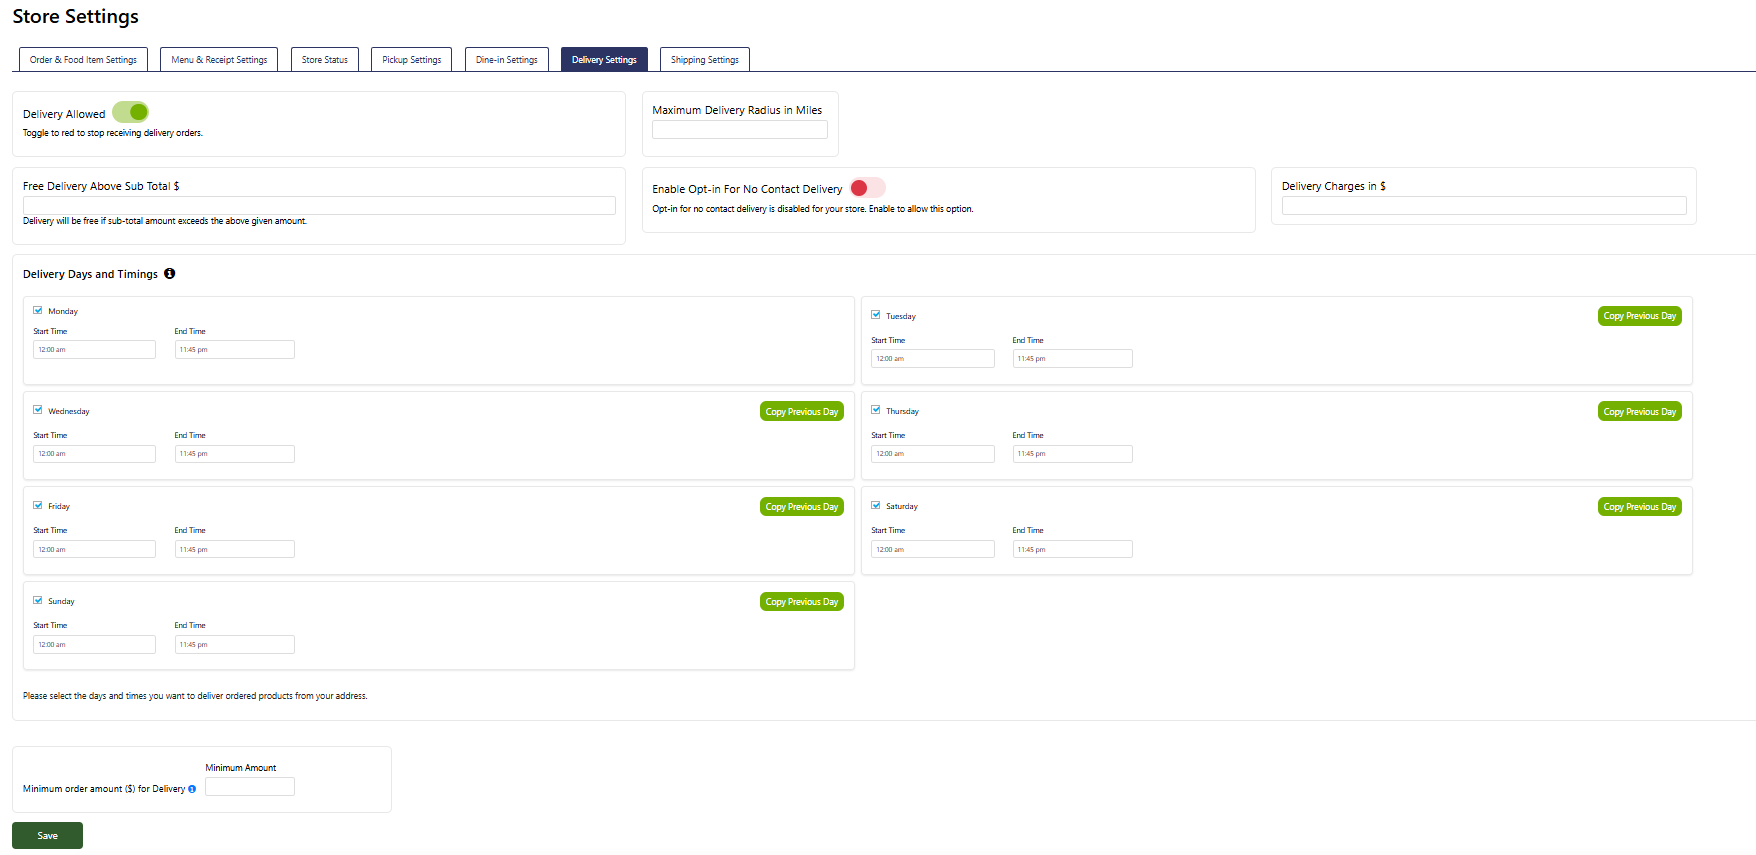
Delivery Allowed: Toggle this switch to red to stop receiving delivery orders. When green, delivery orders are allowed.
Maximum Delivery Distance in Miles: Enter the maximum delivery radius (in miles) from the primary address to which you are willing to deliver orders.
Free Delivery Above Subtotal $: Set a minimum order amount (e.g., $50) for free delivery. The customer will be billed for the delivery charge if the order amount is below this subtotal.
Enable Opt-in for No Contact Delivery: Toggle this switch to enable if you offer a no-contact delivery option.
Delivery Charges in $: Enter the delivery fee for orders below the minimum amount needed for free delivery. This is one standard charge for all deliveries.
Delivery Days and Timings: Set the specific days and start/end times for delivery orders by selecting each day and entering the appropriate hours. This feature enables you to customize your store's weekly delivery schedule fully, ensuring customers are aware of when delivery is available.
Note: Once you set up the hours for a day, you can copy the settings to the next day by clicking the 'Copy Previous Day' button for that weekday.
Minimum order amount ($) for Delivery: Enter the minimum dollar amount required to accept a delivery order. The customer cannot place an order for delivery until that minimum amount is reached. Leave the field blank if there is no minimum amount requirement.
Note: Please remember to click the 'Save' button at the bottom of the page after making any changes.
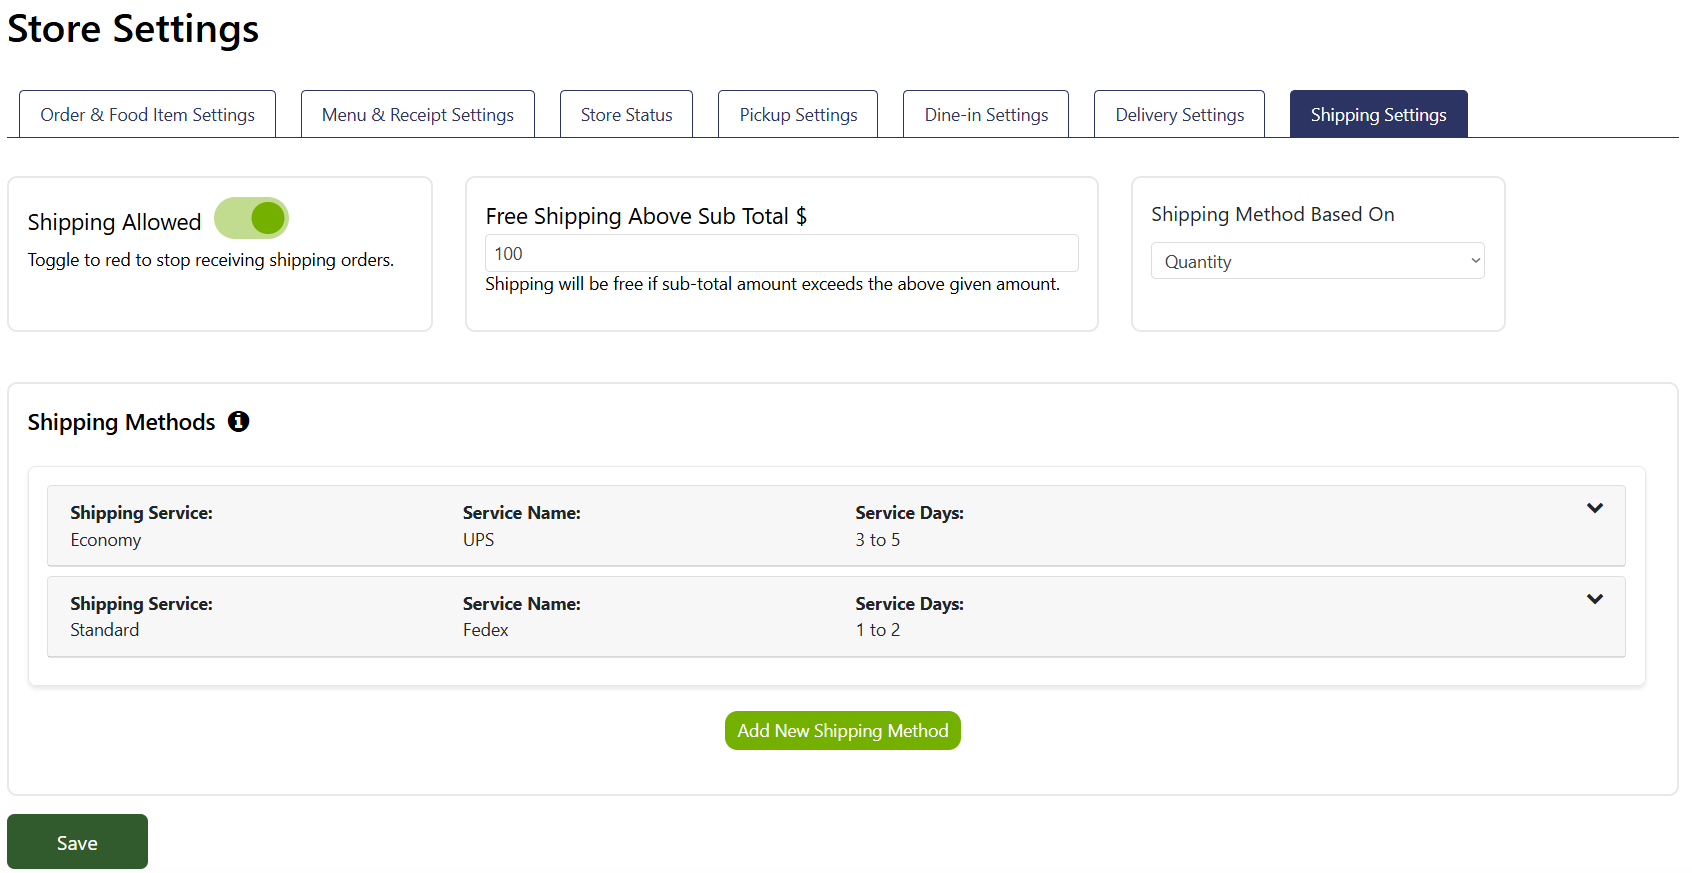
Shipping Allowed: Toggle this switch to red to stop receiving shipping orders. When green, shipping orders are allowed.
Free shipping above Subtotal $: Shipping will be free if sub-total amount exceeds the above given amount in USD. Leave blank or remove to apply shipping charges anyway.
Shipping method based on: This selection only has one option “Quantity” at the moment, this means that shipping fees will be calculated based on quantity of dish items.
Shipping Methods:
If you have created any shipping method these will be displayed or you may click on “Add New Shipping Method” to create one.
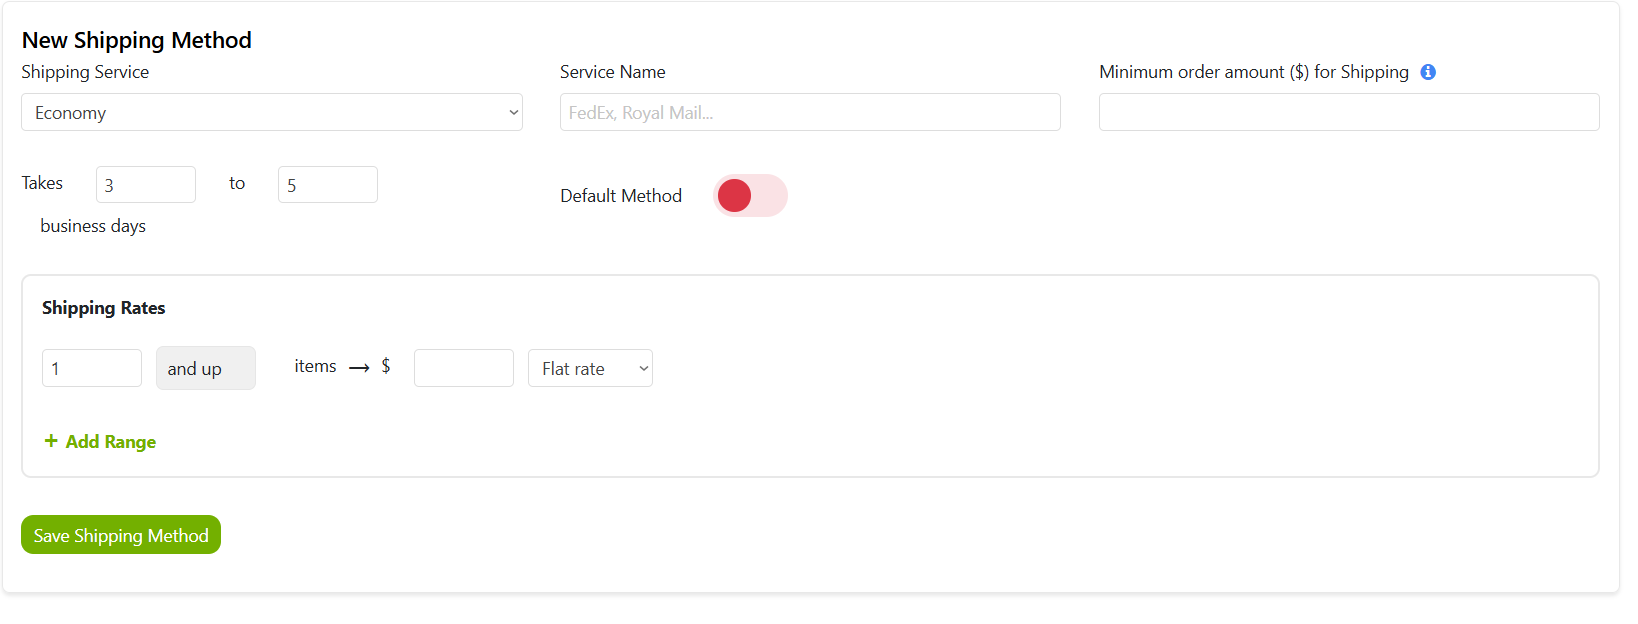
Shipping service: You can select from “Economy”, “Standard” or “Express”.
Service name: Please provide the name of your choice.
Minimum order amount ($) for Shipping: Please enter the minimum order amount you require for shipping. Leave it blank if there's no minimum requirement.
Takes X to Y business days: You can enter the minimum and maximum number of days it will take for the shipment to reach its destination.
Default Method: Toggle this option to green if you want this option to be selected by default on frontend for buyers while placing shipping orders OR toggle to red so buyer will manually select shipping method from your created list of shipping methods.
Shipping rates: Please enter shipping rate for range of item quantities, you may also select that rate will be “Flat Rate” or “Per each”.
Note: Please remember to click the 'Save Shipping Method' to save shipping method changes.
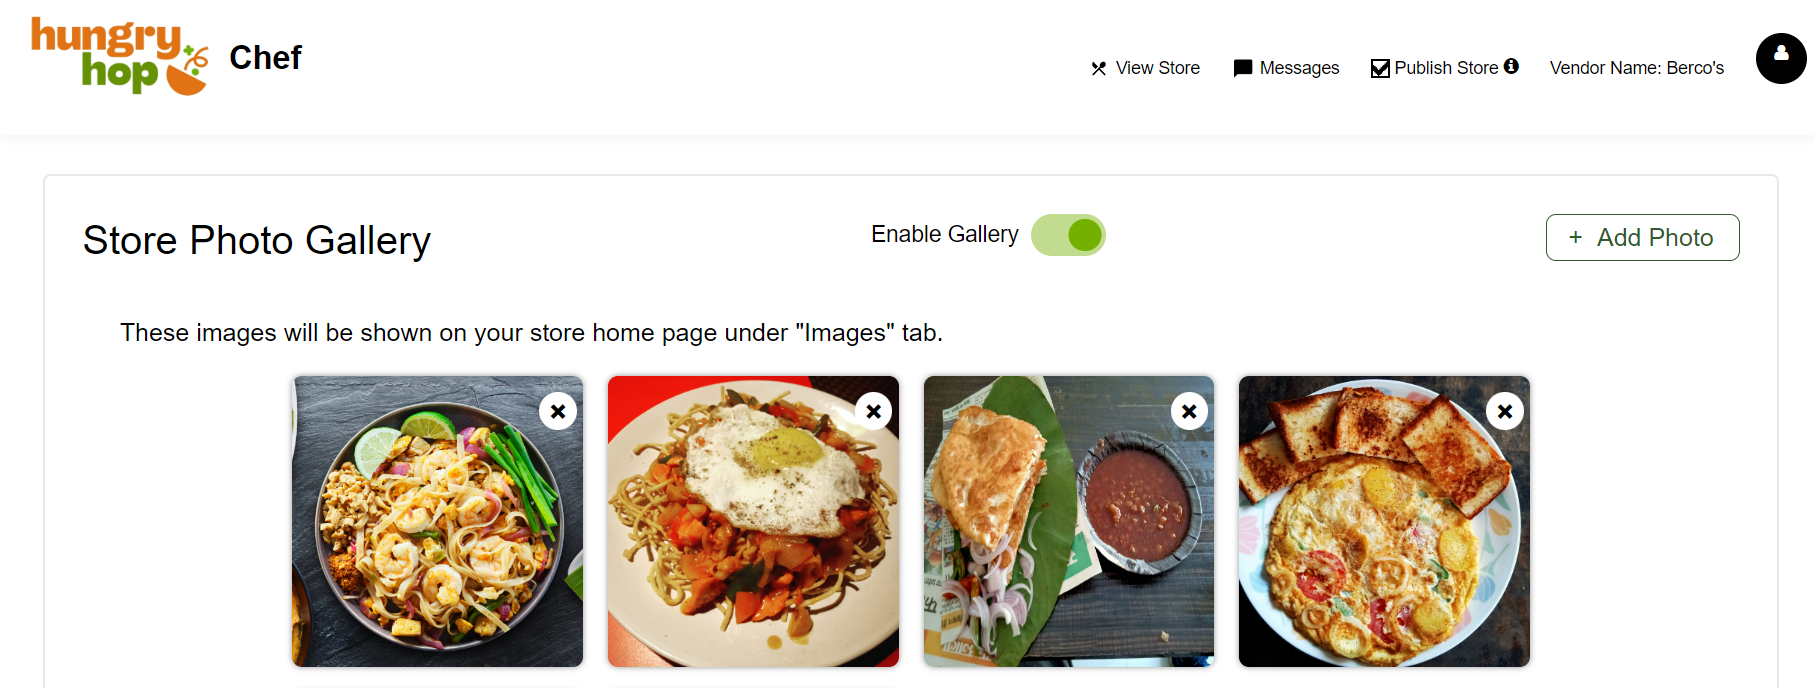
Upload images of your store here to display them on your store's homepage under the "Photos" tab. These images can be your dish item images or your store images. Note that images for individual menu items can be uploaded later using the “Menu Management” option.
Images can be in .webp, .jpg, .jpeg or .png format with in square dimensions to perfectly fit on the front end.
Toggle “Enable Gallery” to green to show images on front end store or turn to red to hide the “Photos” tab.
Note: Please remember to click the 'Save' button to save changes.
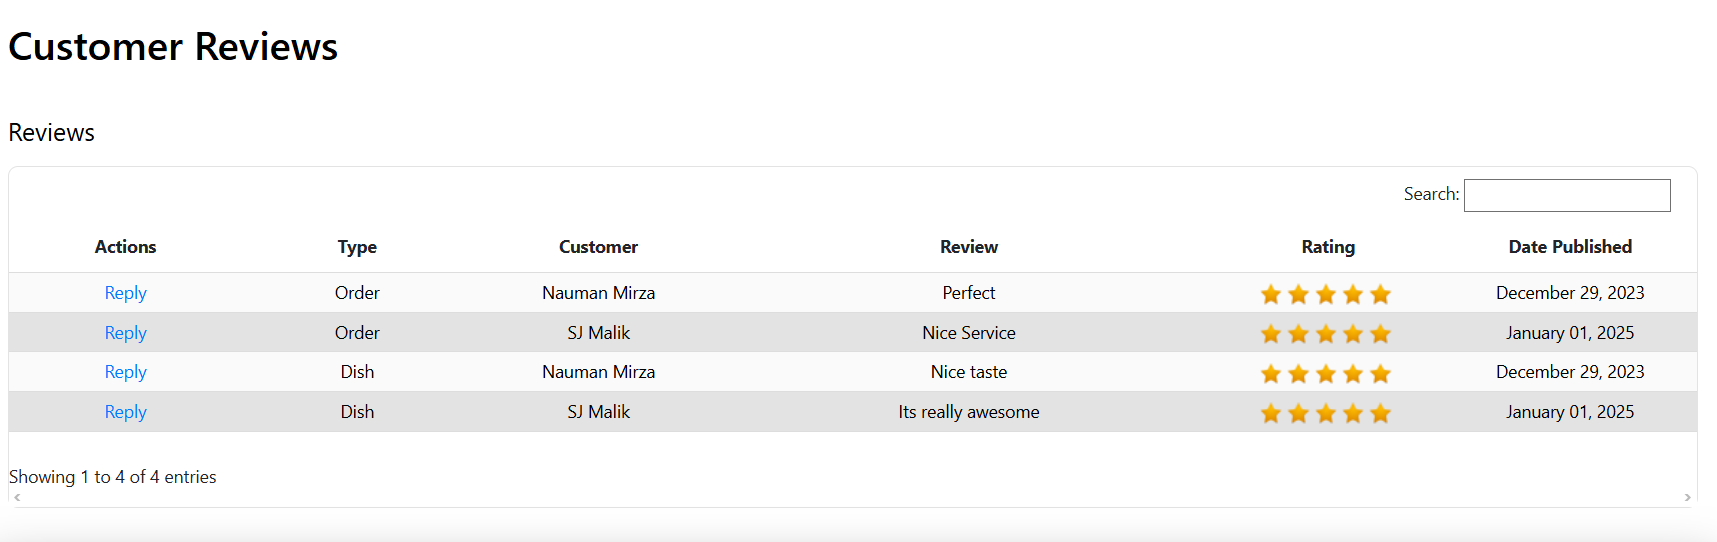
In this section, you can view reviews submitted by customers about your store. Once an order is successfully completed, customers can leave feedback for the overall order and individual items within it. These reviews will also appear in the reviews tab on your storefront.
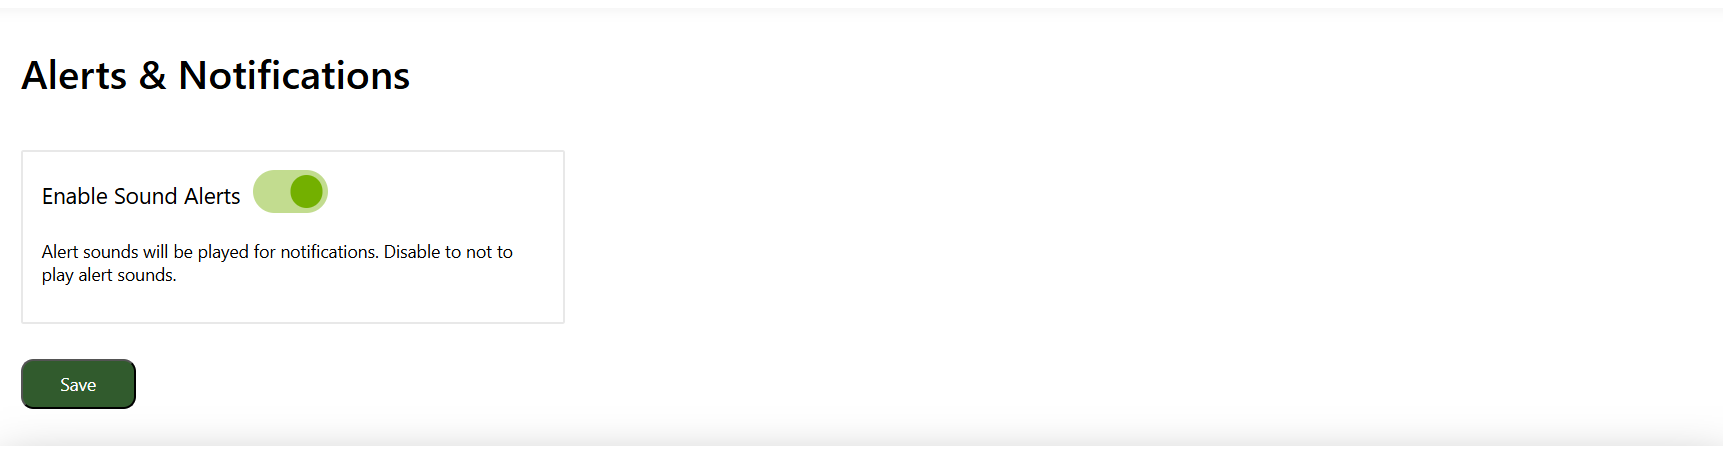
If enabled, whenever you receive an order and you are logged in to your seller dashboard, you will hear an alert sound.
Note: Please remember to click the 'Save' button at the bottom of the page after making any changes.
After completing your store settings, proceed to the Menu Management section to set up your menu.
The menu setup begins with Product Categories, where you create high-level categories to organize your menu. Examples of categories include:
Feel free to create any categories that suit your menu structure.
Once your categories are set, you can define individual menu items in the Products tab. A single menu item can belong to multiple categories. For example, a menu item called "Basil Tomato Soup" can be assigned to several categories, such as Lunch, Dinner, Sides, and Hot, based on the examples above.
On your site, the menu will display these product categories along with their respective menu items, making it easy for customers to explore your offerings.
Similarly, the “Add-on Categories” option allows you to create high-level categories to organize extras that customers can add to customize their orders. For example, you can create an add-on category called "Sweetener", under which you can define individual add-on items, such as Raw Sugar, Cane Sugar, Stevia, Brown Sugar, Splenda, and others. These add-on items will be defined in the next section.

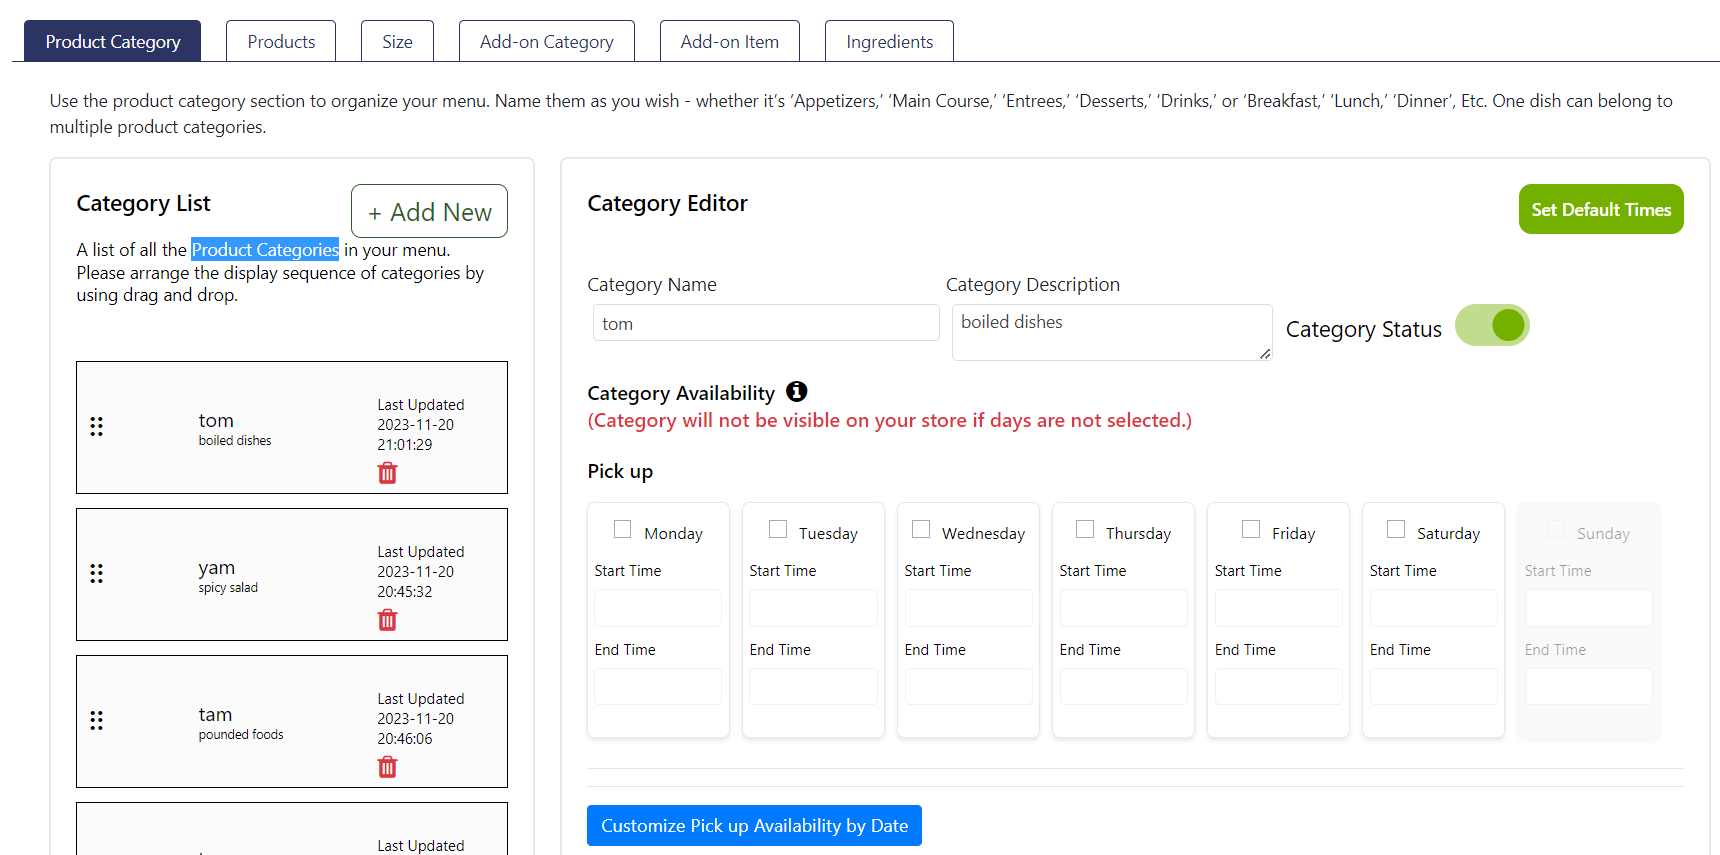
This is where you create high-level categories to organize your menu. Refer to the explanation above for further details.
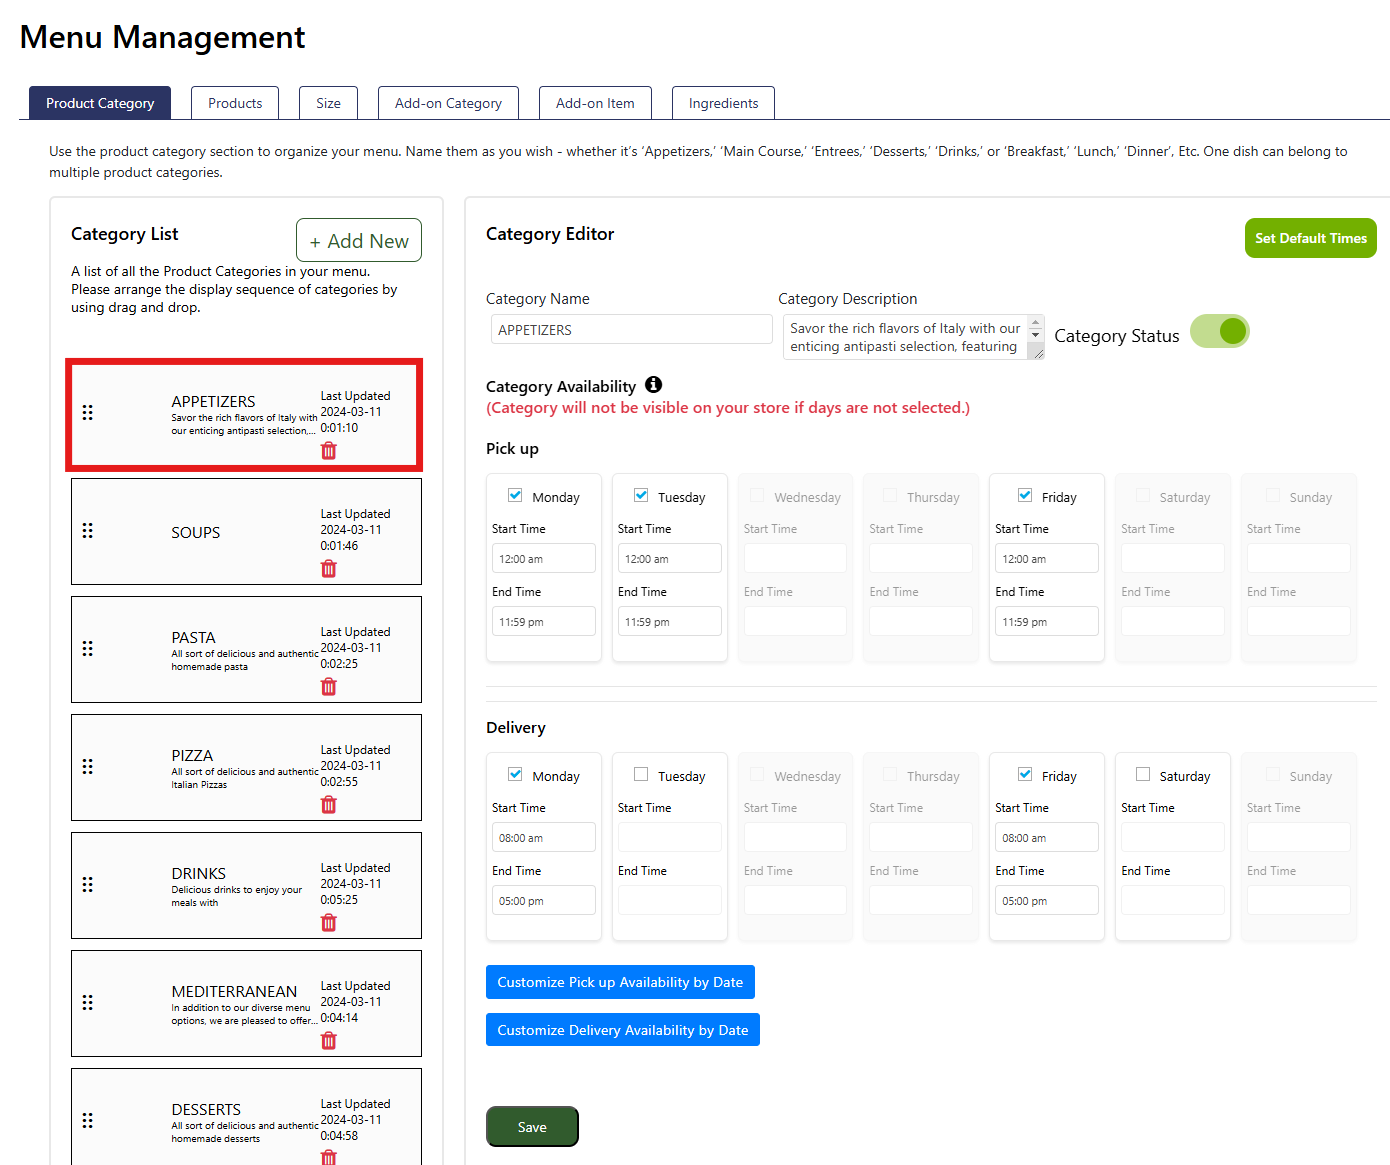
Click on a category to fill in the details.
Category Name: Enter the name of your category. This name is displayed on your website page.
Category Description: This field is for internal use only and will not be visible to customers. Use it to add notes or additional information about the category for your reference.
Category Availability: Define the specific days and times when the products in this category will be available to customers. By default, the category availability matches your store hours for the chosen service type (Pick-up, Dine-in, Delivery). You can update these times as needed to suit your requirements.
Set Default Times: Click this button (located at the top right) to reset the category availability times to match your store’s default operating hours.
Category Status: Enable this option to publish the category on your website. If this option is disabled, the category will not be visible to customers. This is useful when creating a new category, making updates, or offering a seasonal category.
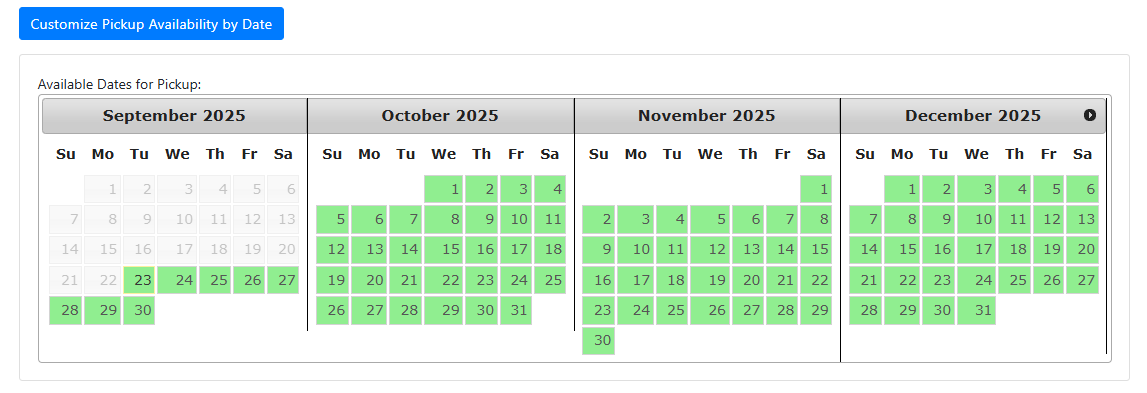
Customize Pickup (or Delivery) Availability Days: Use this feature to set specific calendar days when the category will be available to customers. For example, if a dish is prepared only on two days in a month, you can configure the availability for those exact days using this setting.
Note: Please remember to click the 'Save' button at the bottom of the page after making any changes.
Products are individual menu items that you will sell. Click "Add new" and provide the Food Item's Name, Description, and category. You can turn the item's status on or off according to its availability.
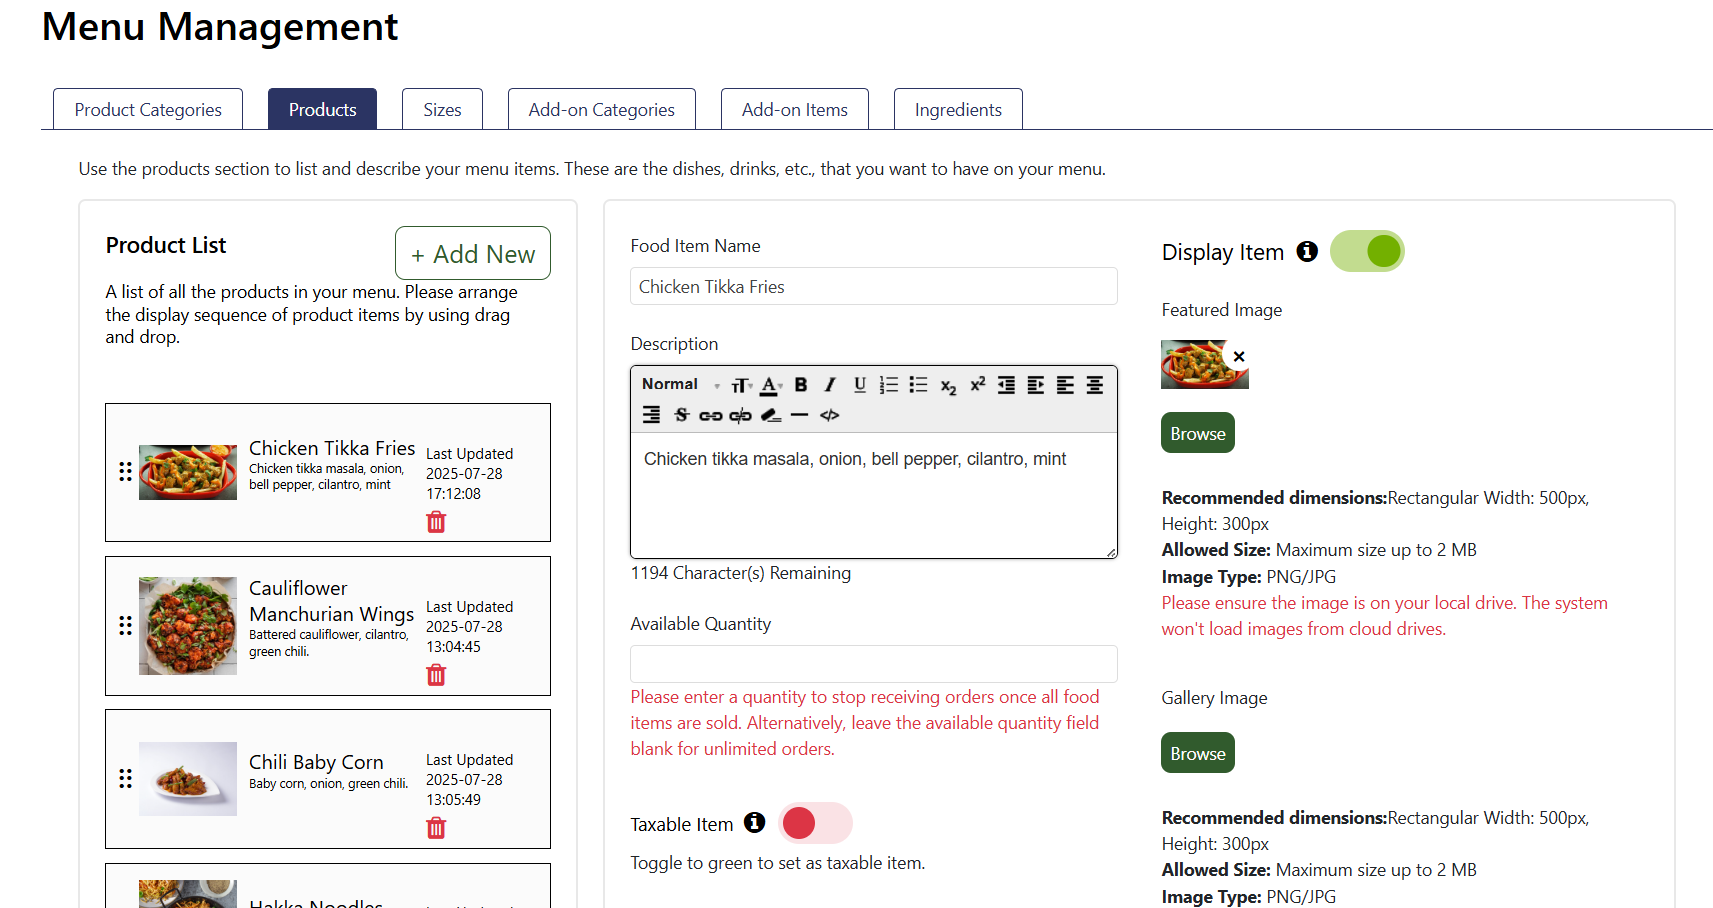
Add New Product Form: This is where you’ll create your new dish:
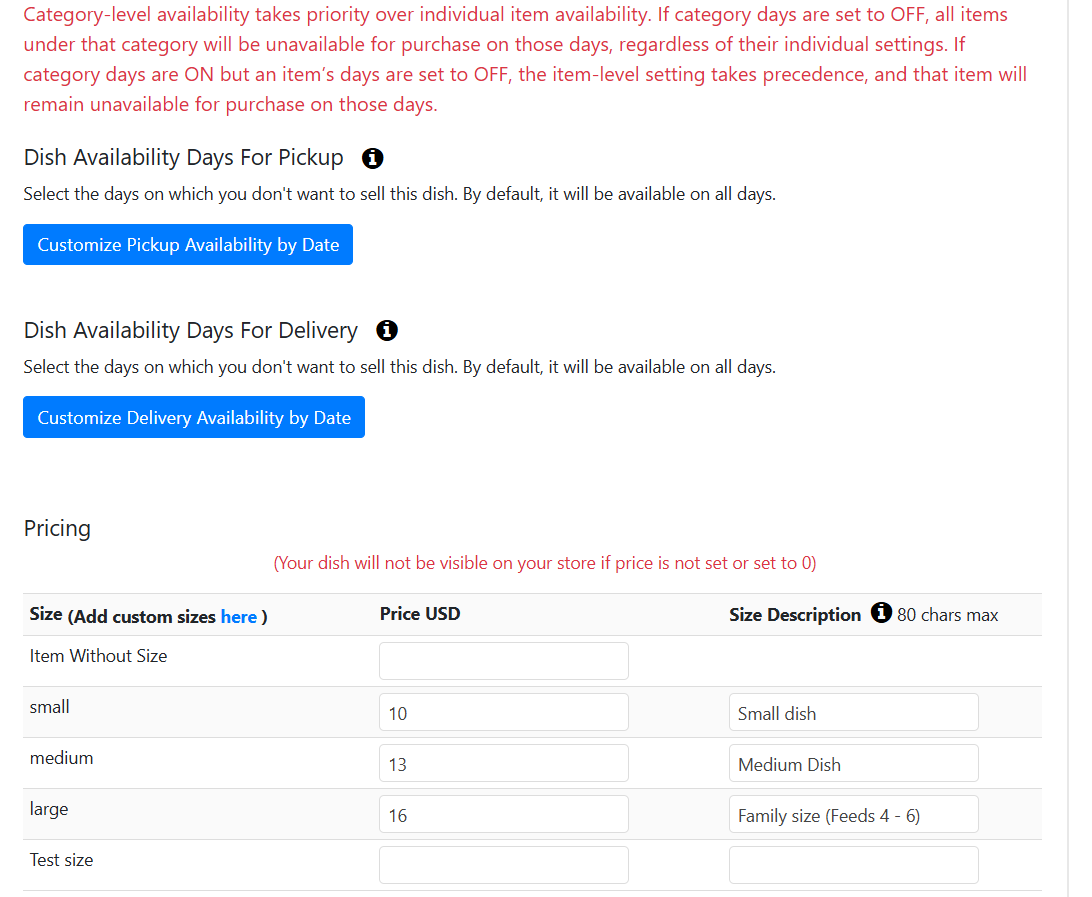
This screen allows you to configure availability days and pricing details to ensure your dish is accessible and priced right for your customers. Here’s how to proceed:
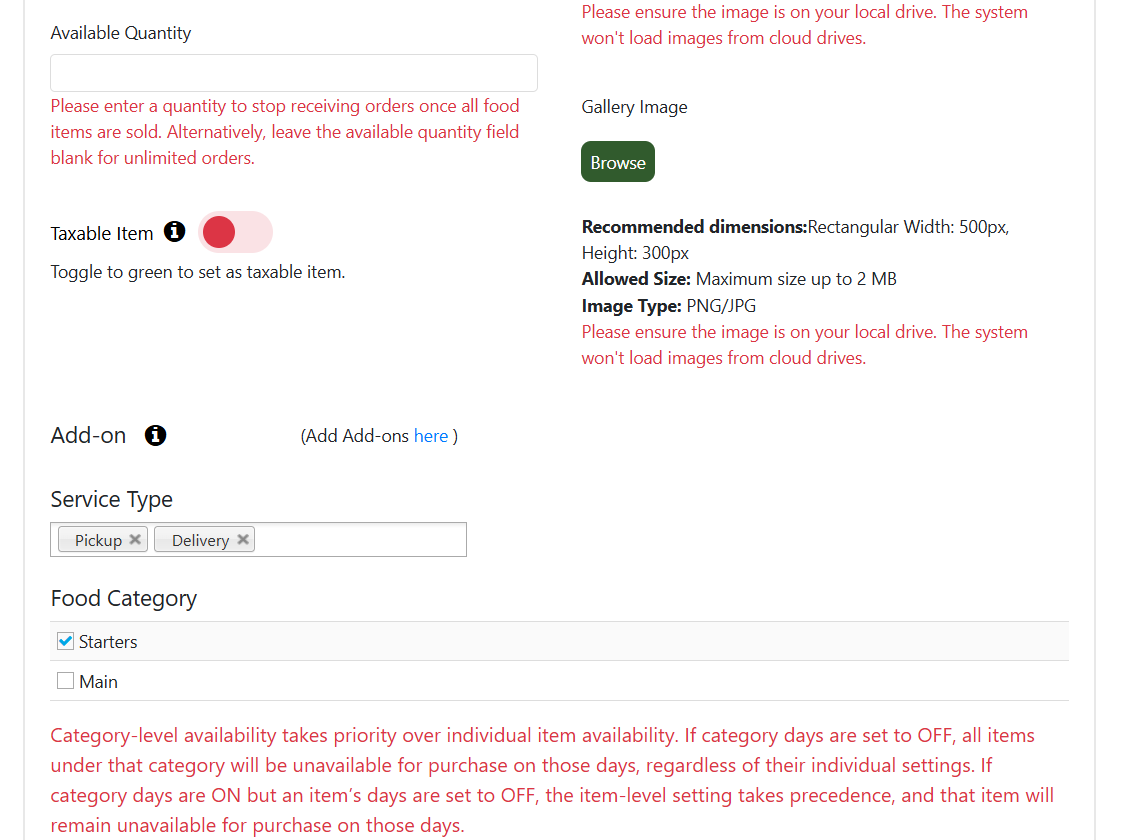
Note: Category-level settings can override individual dish availability. If a category is set to OFF, your dish won’t be available on those days regardless of its own settings. If the category is ON but your dish is set to OFF, your dish will remain unavailable on those days.
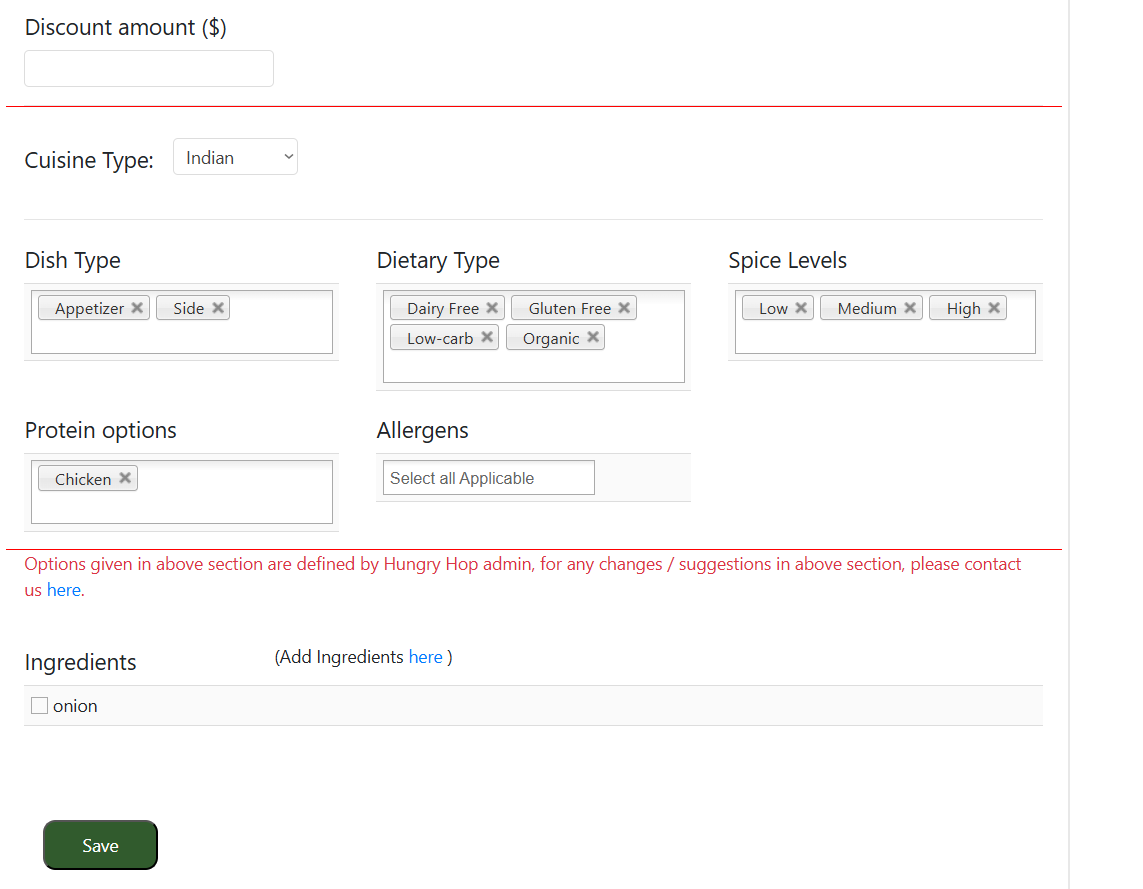
Use these settings to set the details and preferences of your dish. These settings power search and filtering across the platform, helping customers find the most relevant products. Choose your options carefully to ensure your dish appears correctly in filtered results based on customer selections.
Note: Please remember to click the 'Save' button at the bottom of the page after making any changes.
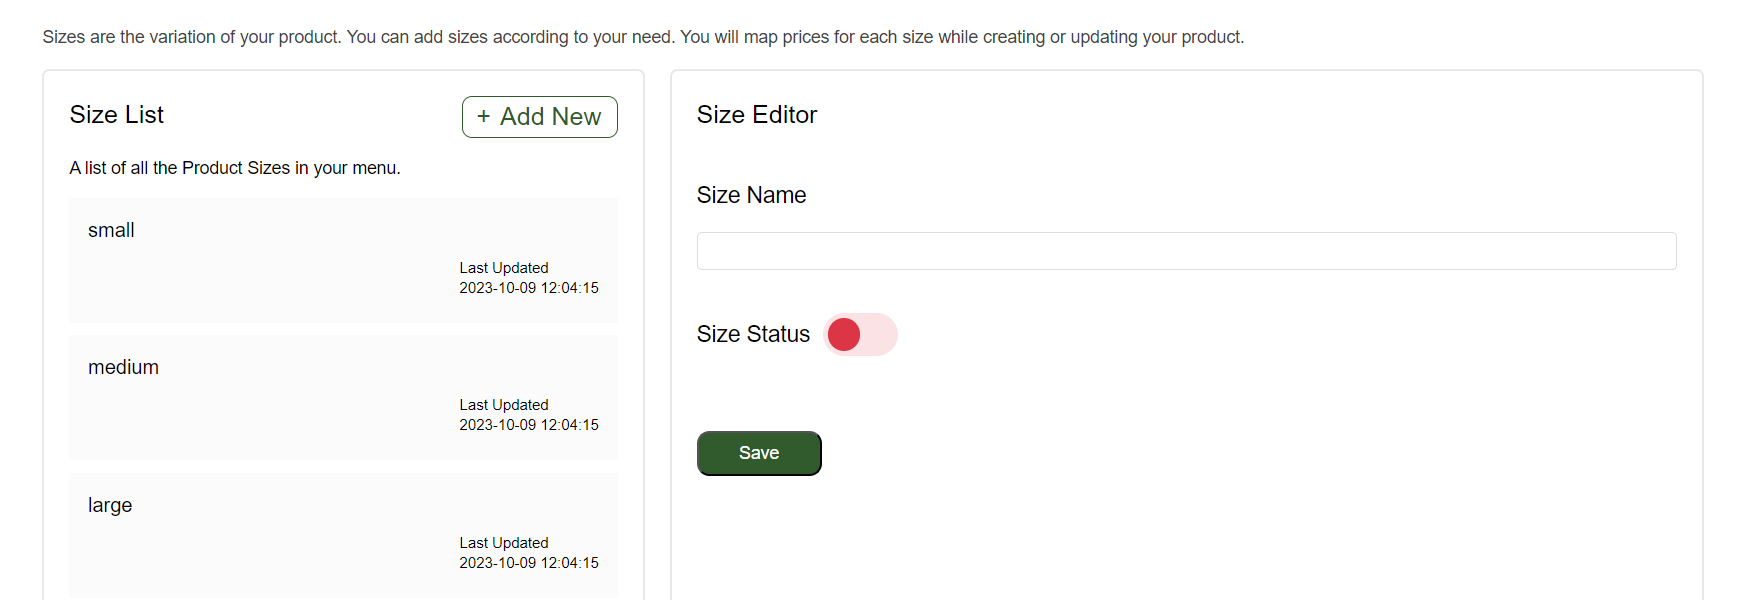
The "Size" section is where you can manage the different size variations for your dish. This screen allows you to customize and organize sizes, offering flexibility to your customers. Here’s how to set it up:
Note: Please remember to click the 'Save' button after making any changes.
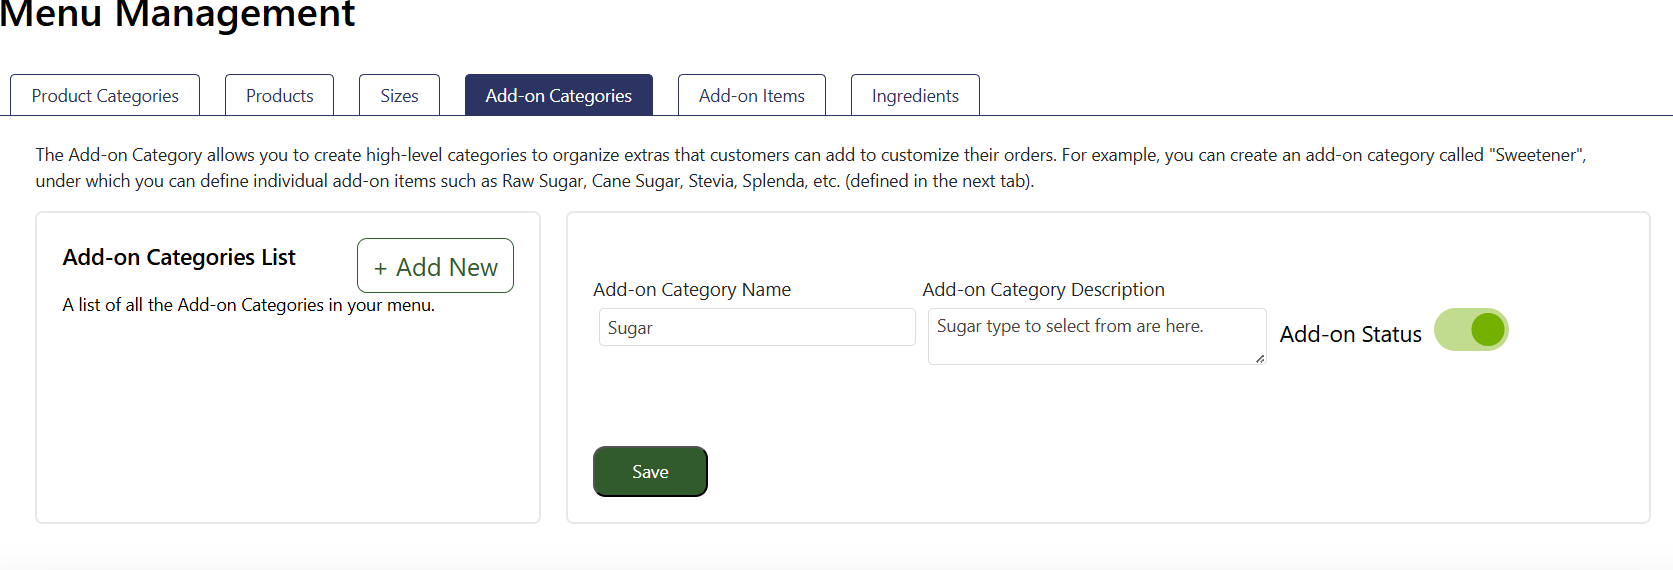
The Add-on Category allows you to create high-level categories to organize extras to a dish item that customers can add to customize their orders. For example, you can create an add-on category called "Sweetener", under which you can define individual add-on items such as Raw Sugar, Cane Sugar, Stevia, Splenda, etc. (defined in the next tab).
Note: Please remember to click the 'Save' button after making any changes.
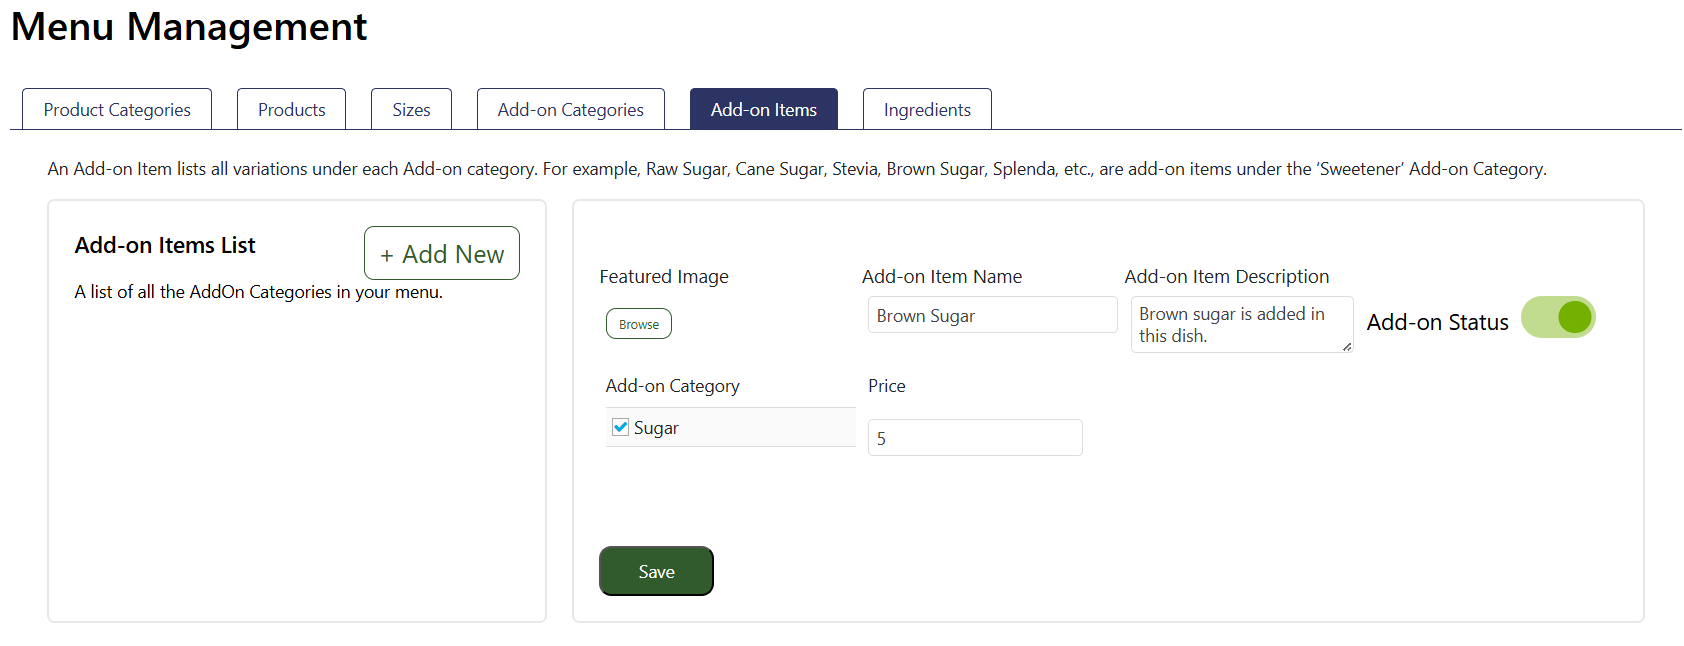
Add-on items are a list of items that customers can add to their order in addition to the dish offered, such as extra sugar or cream in coffee or more toppings and other add-ons on a pizza dish.
An Add-on Item lists all variations under each Add-on category. For example, Raw Sugar, Cane Sugar, Stevia, Brown Sugar, Splenda, etc., are add-on items under the ‘Sugar’ category you created in the previous “Add-on Categories” tab.
Note: Please remember to click the 'Save' button after making any changes.
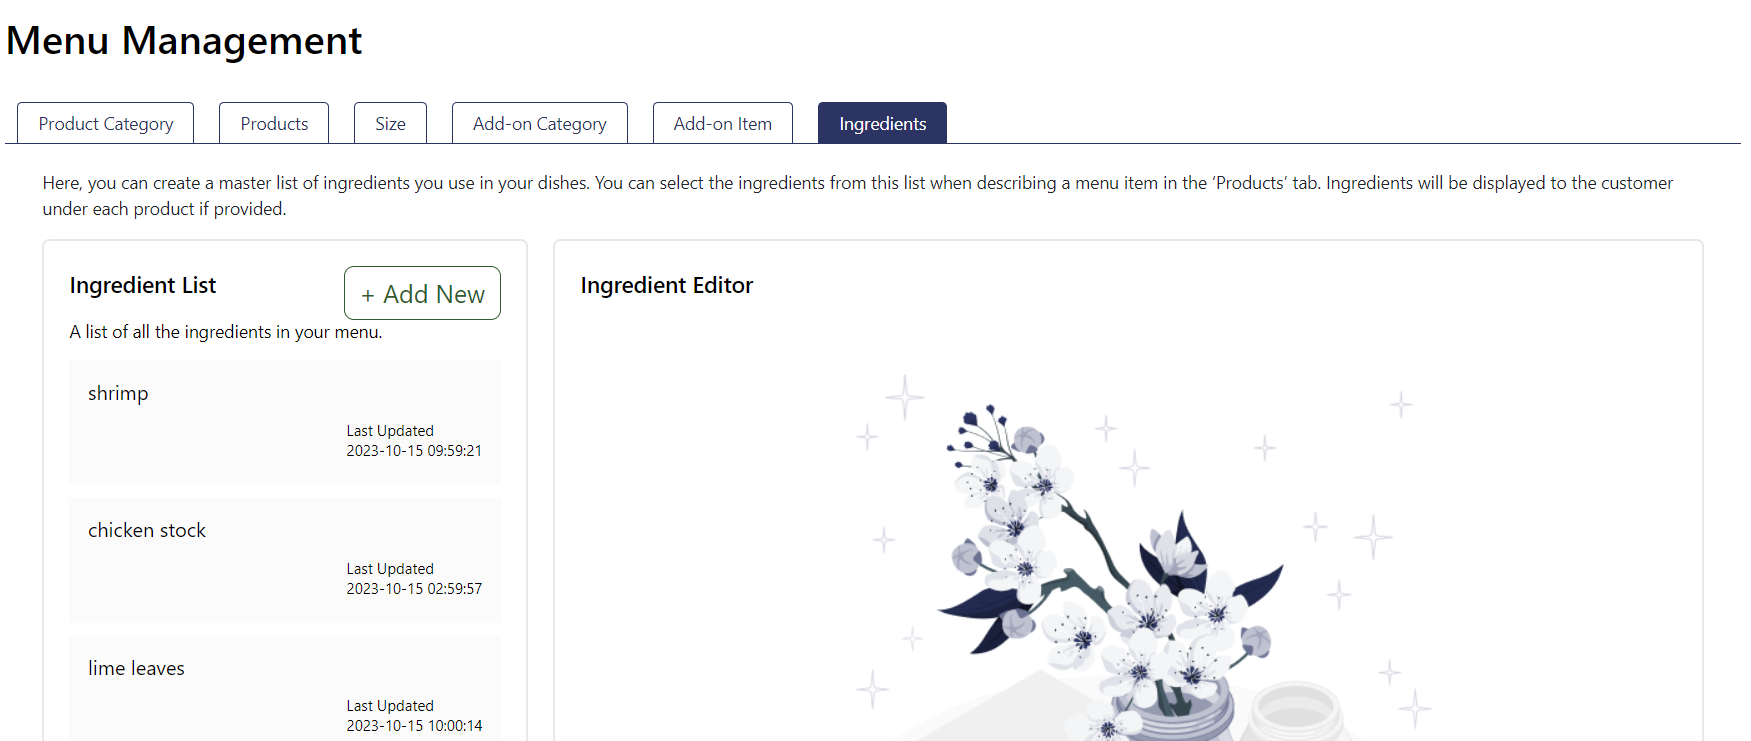
Here, you can create a master list of ingredients you use in your dishes. You can select the ingredients from this list when describing a menu item in the ‘Products’ tab. Ingredients will be displayed to the customer under each product if provided.
Note: Please remember to click the 'Save' button after making any changes.
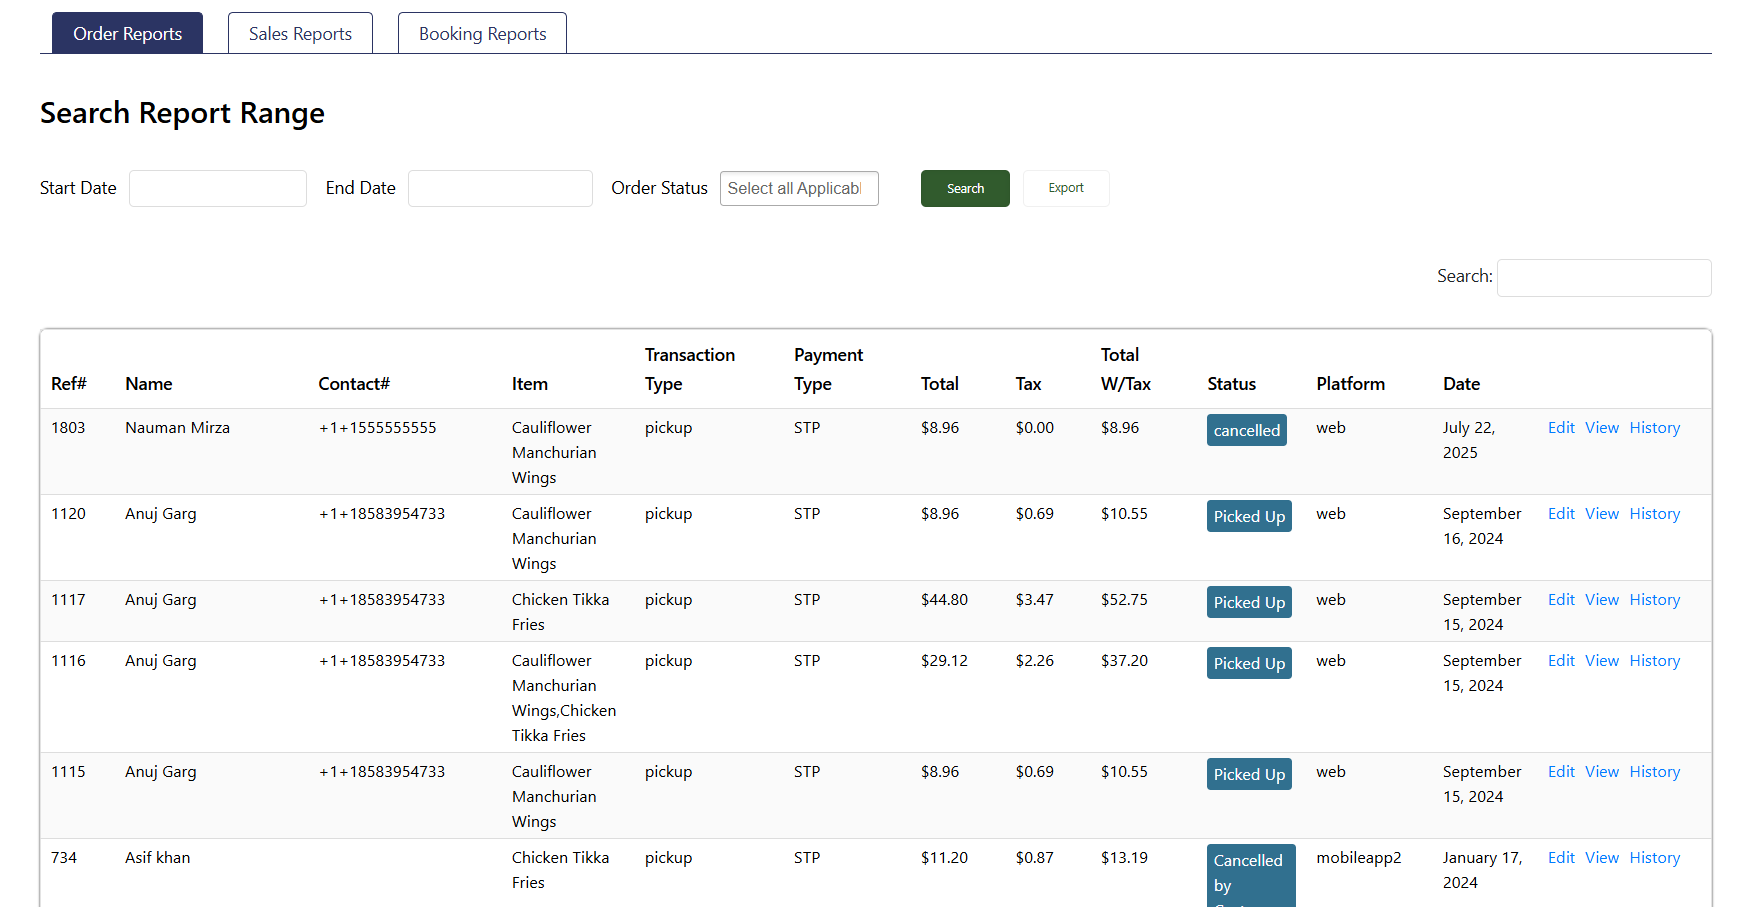
In this section, you can see reports related to your orders received. You can also manage orders from here.
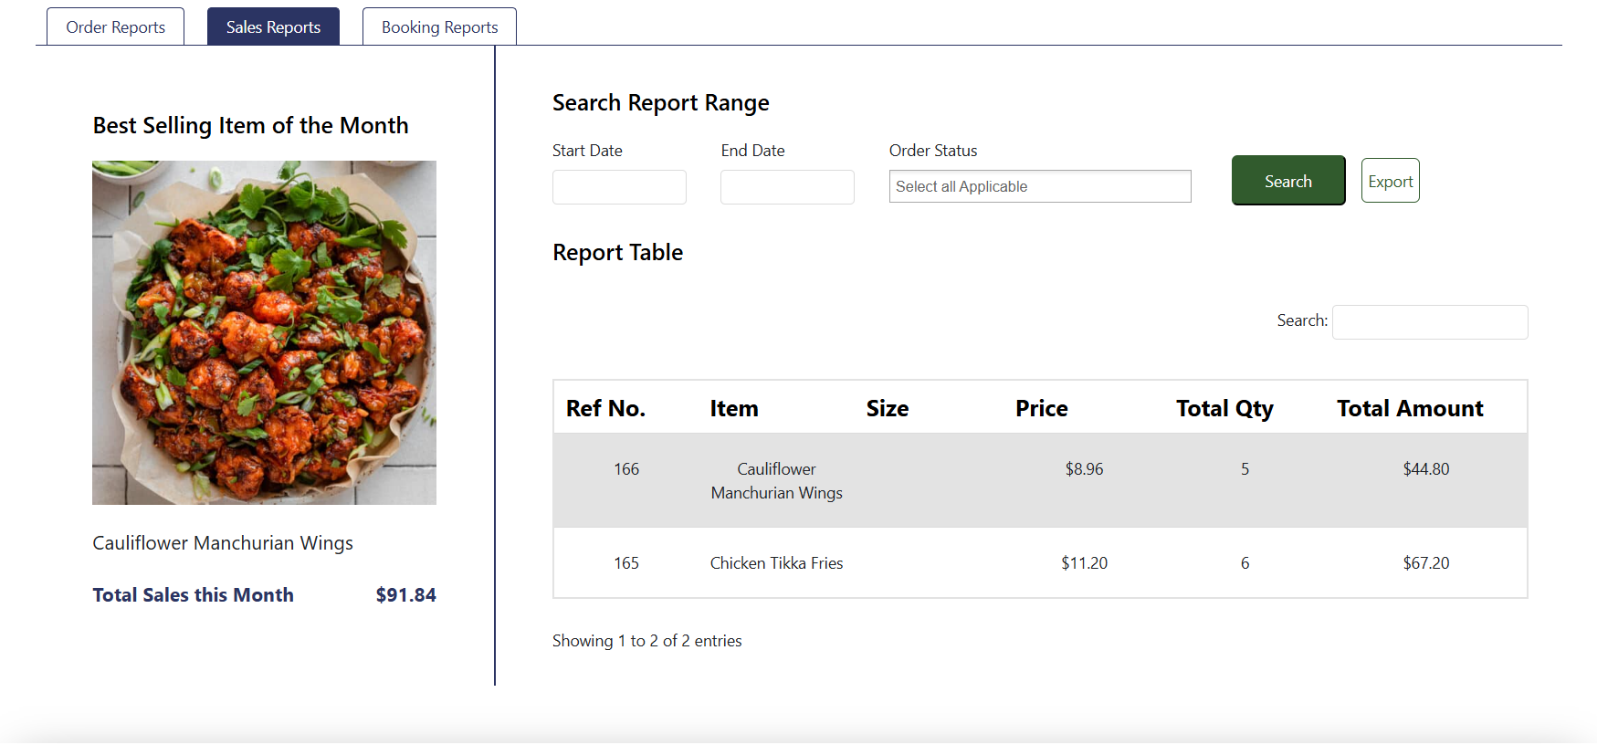
The “Sales Report” section displays the best-selling items.
Use this section to add new users who can log in and assist in managing your store. Assign each user the appropriate access level so they can perform only the tasks you authorize.
Store Setting > Product Category > Product
Calendar Hierarchy in Store Operations
The calendar hierarchy is a structured system used to decide and manage the operational timings of a store, its product categories, and individual products. This hierarchy ensures that scheduling and operational hours follow a top-down approach, where the overarching store-level settings precede product categories and individual products.
Importance of Calendar Hierarchy
The purpose of this hierarchy is to provide sellers with a flexible yet controlled system for managing when their products are available to customers. By structuring the settings from store level down to individual products, sellers can improve their operational workflow, avoid scheduling conflicts, and ensure that customers are presented with the correct options based on the store's overall availability.
Example Use Case
If a seller runs a restaurant and wants to set special brunch items available only on Sundays, they would:
This system ensures smooth coordination between store-level and product-level settings, preventing potential mismatches in product availability and operational hours.
By using this structured approach, sellers on Hungry Hop can effectively manage their store's operations, ensuring clarity for both the seller and the customer about the store's working hours and available menu items.